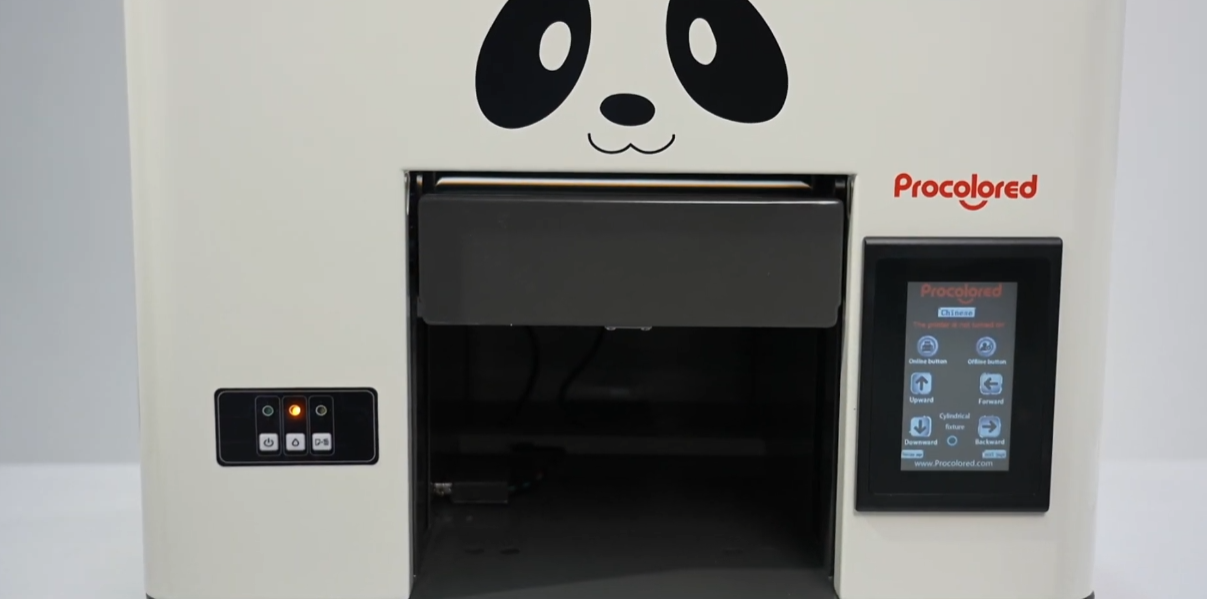
Once the ink and paper lights flash alternately, the waste ink pad is near its end of life.
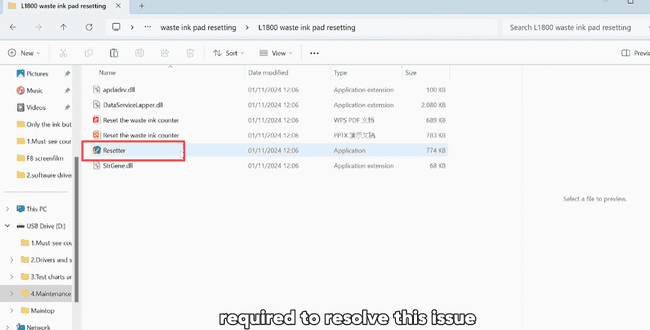
At this point, the waste ink pad error reset software is required to resolve this issue.
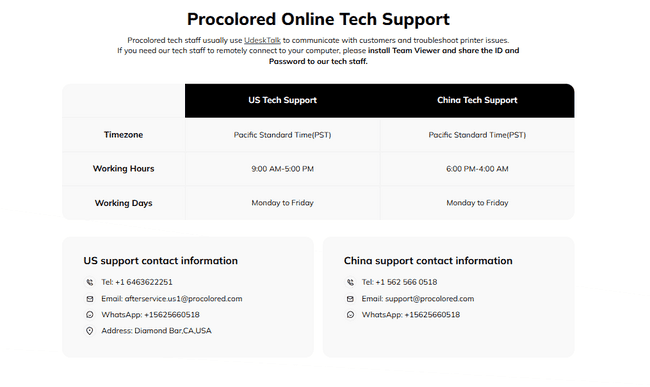
Note: Please contact our after-sales support team to get the software provided to you.
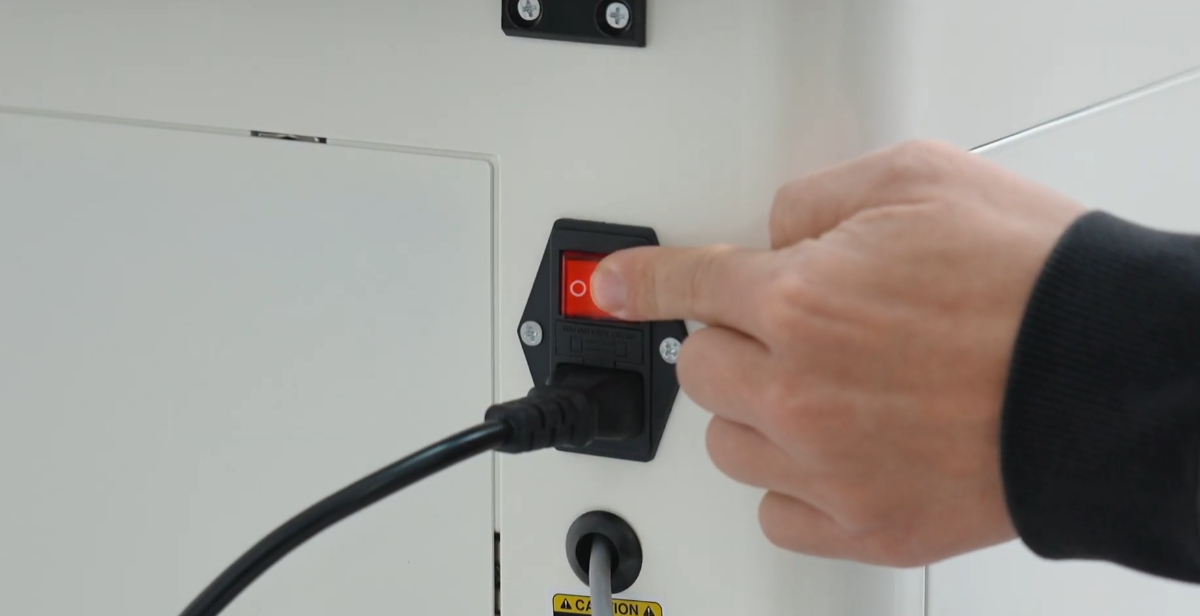
When resetting the ink pad, the printer needs to be powered on and connected to your computer.

Then double-click the software to perform the waste ink pad reset operation.
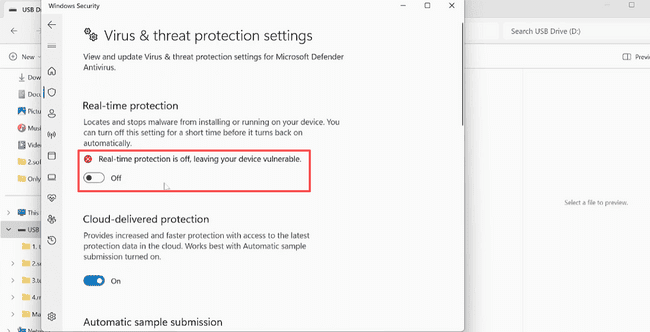
If the software is blocked by antivirus, you need to disable Windows real-time protection.
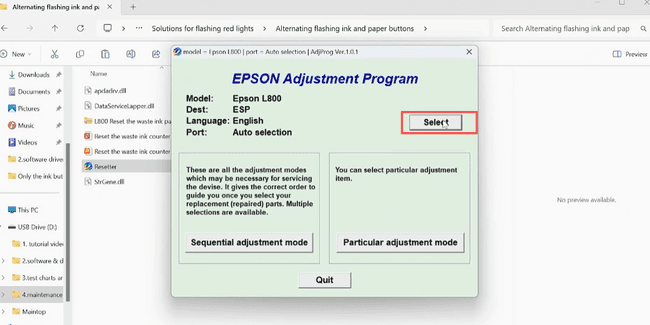
Select your printer model from the drop-down menu.
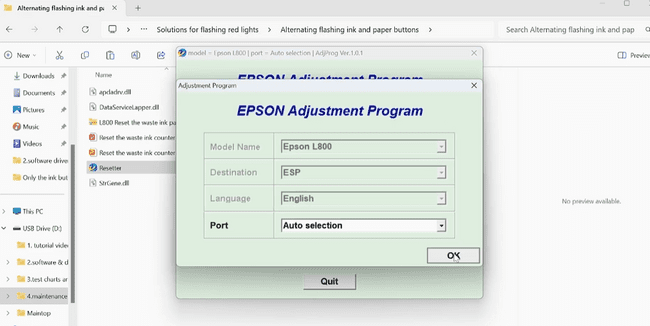
Then click OK to confirm your selection.
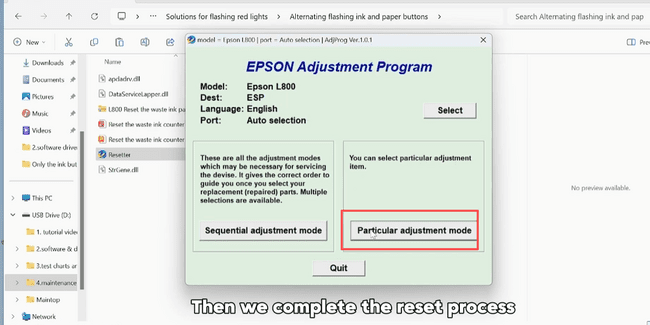
Click the Particular adjustment mode button.
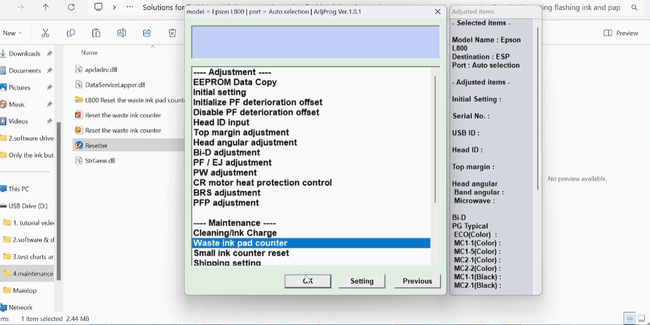
Choose the Waste ink pad counter option.
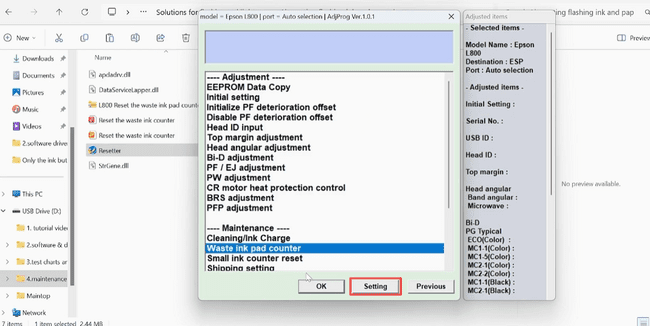
Click the setting button on the interface.

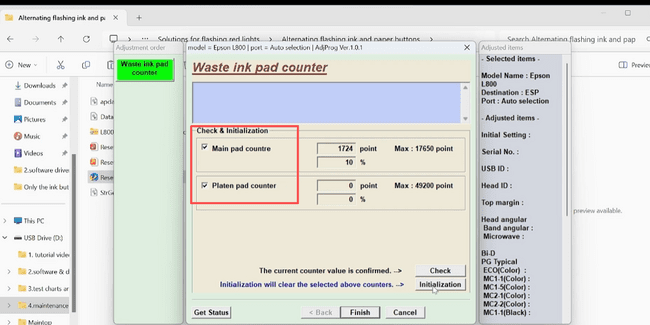
Click OK to move to the counter management.

Click OK again to confirm access.

Choose the two options and then click Check.
Choose the two options again and click Initialize.
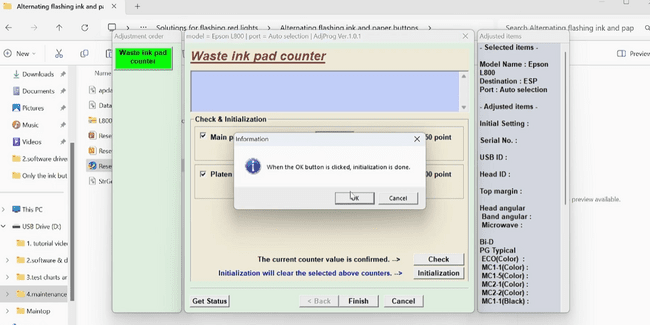
Click OK to complete the reset process.

Add the software as a shortcut in Pro RIP by opening External Program.
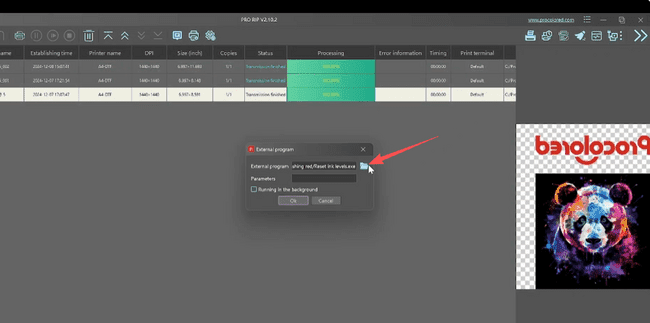
Click the file icon to browse for the application.
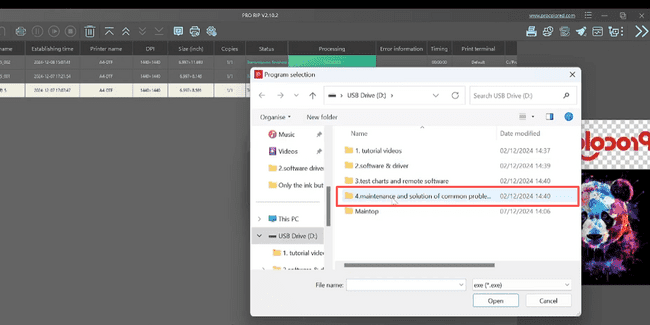
Open the No.4 folder in your directory.
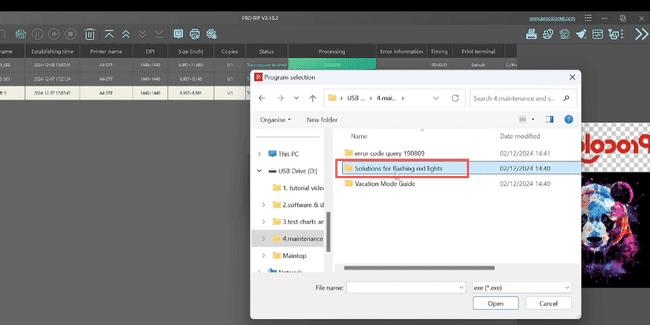
Open the Solutions for flashing red lights folder.
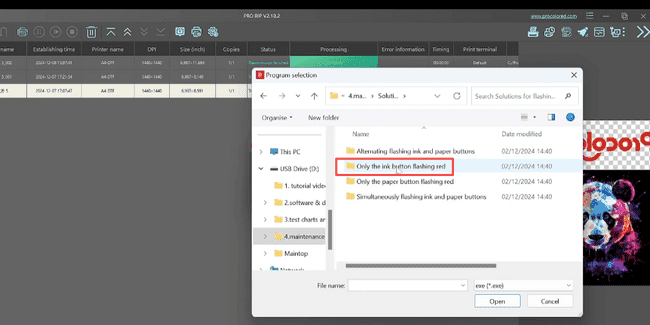
Open the ink button flash red folder within that directory.

Choose Reset ink levels and click open to link it.
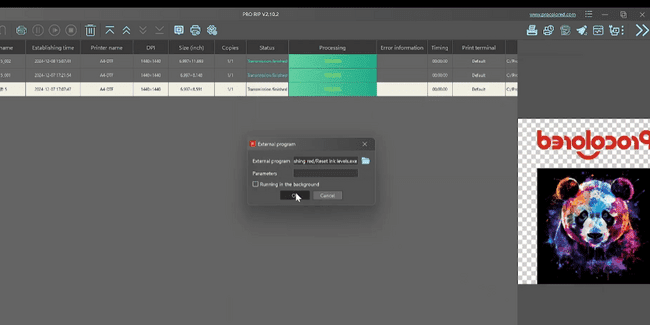
Click OK to finish the shortcut setup in Pro RIP.