If cleaning and ink extraction fail to restore nozzle status, the printhead must be replaced.
Carefully remove the outside clips that secure the printhead assembly.
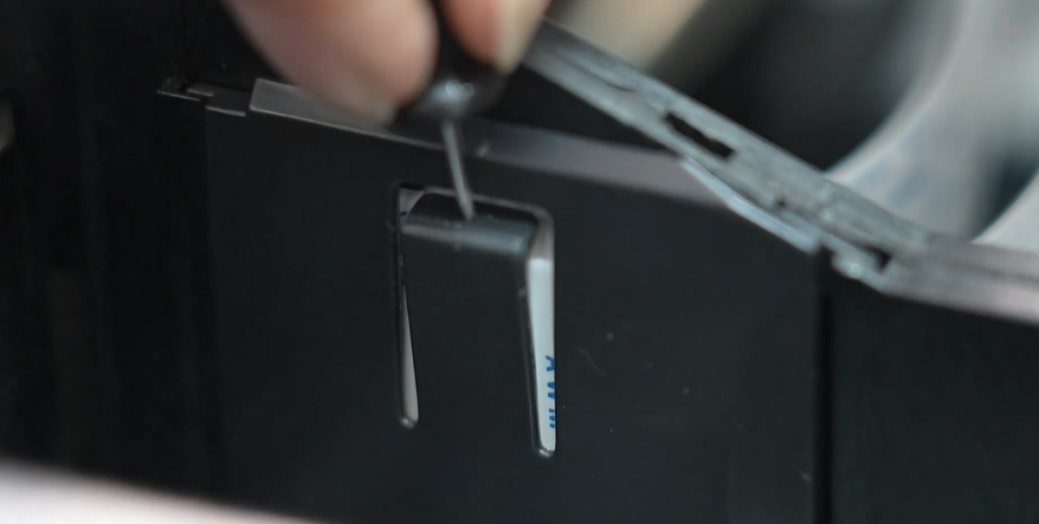
Remove the inside retaining clips to release the head from the carriage.
Unscrew the three screws holding the printhead in place. Keep them safe for reassembly.
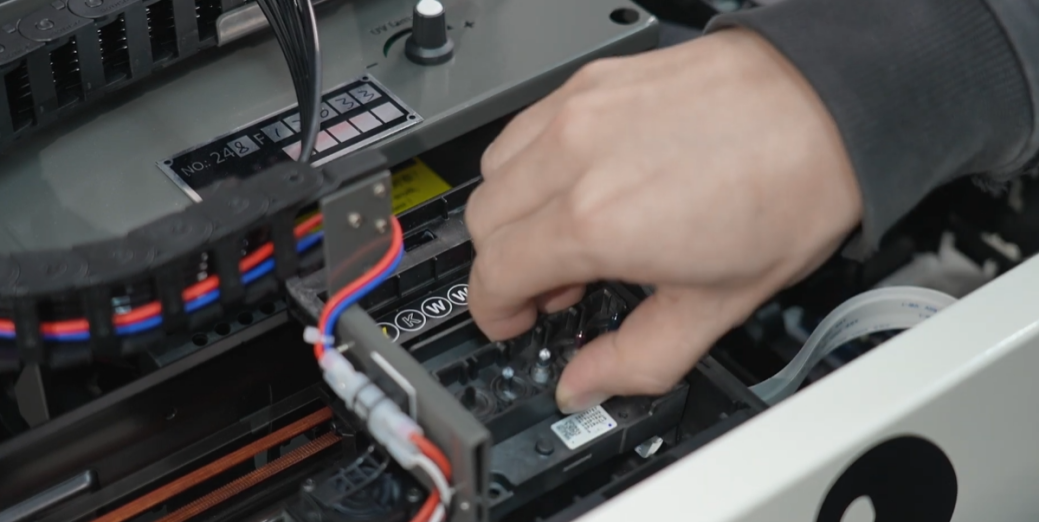
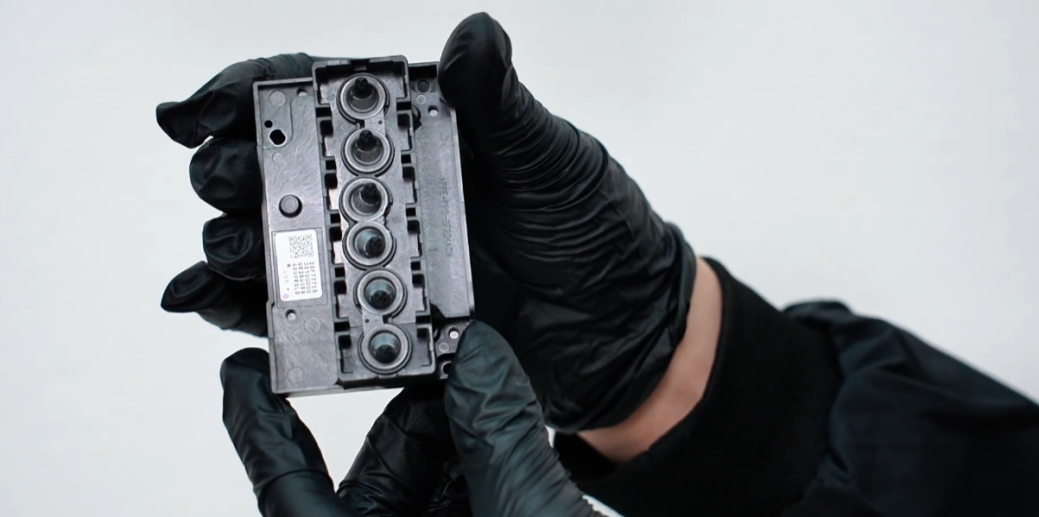
Carefully lift the printhead out of the carriage. Avoid touching the nozzle plate.
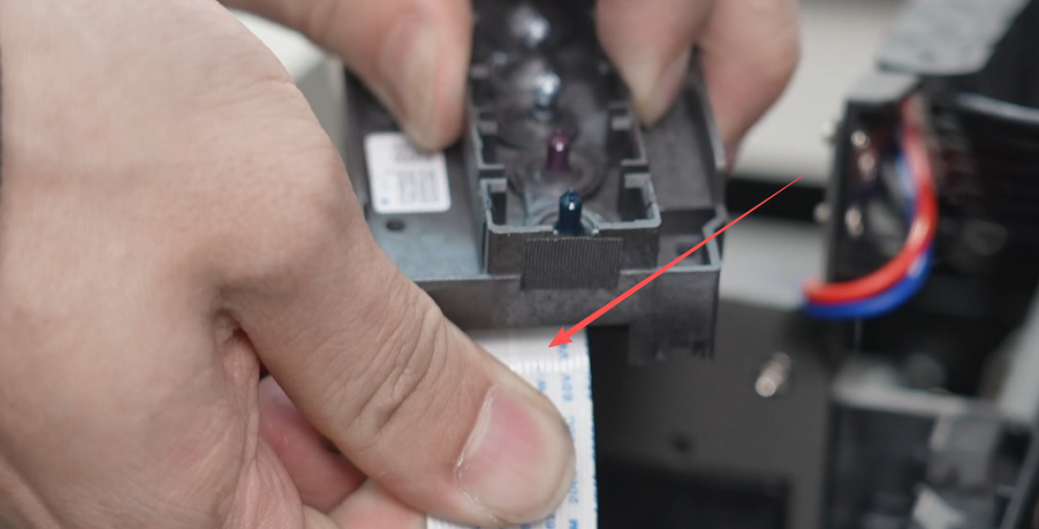
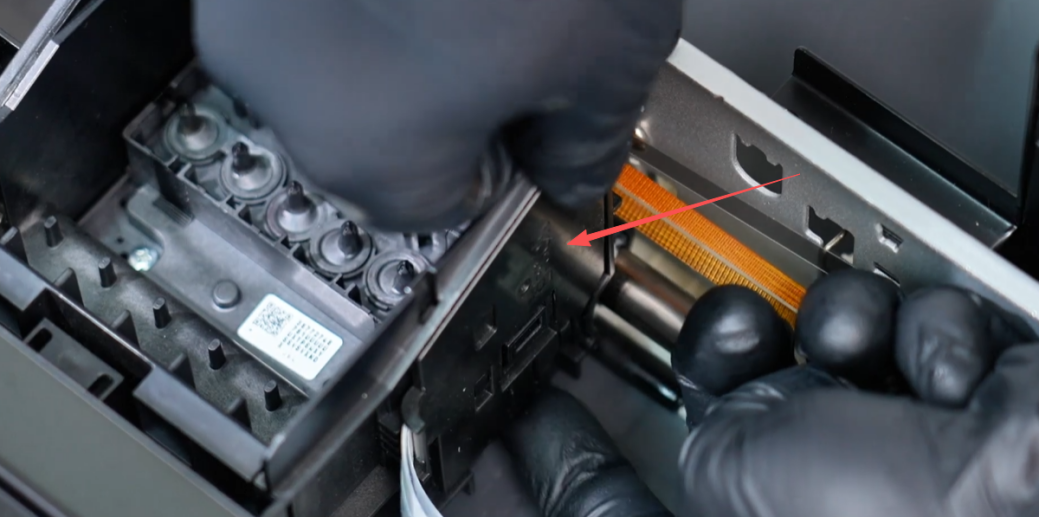
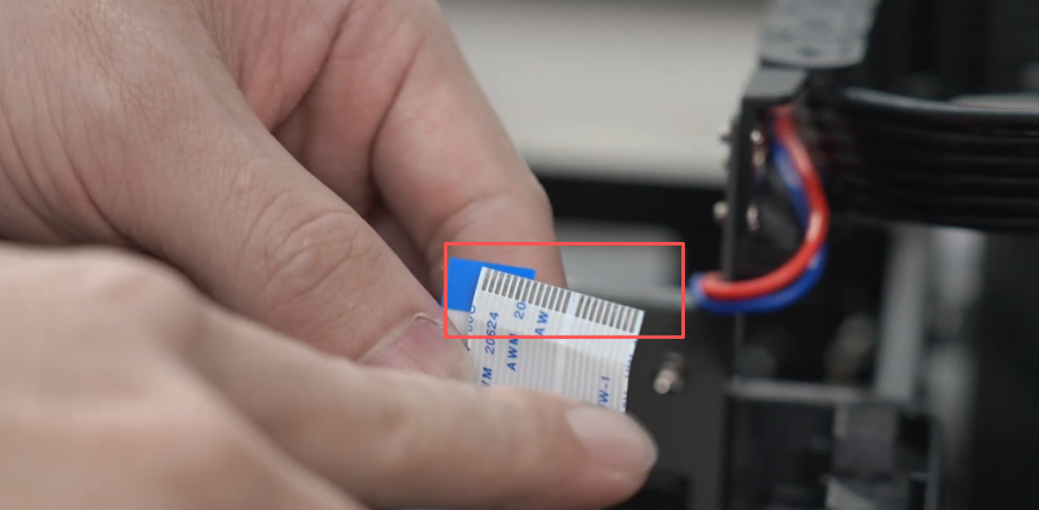
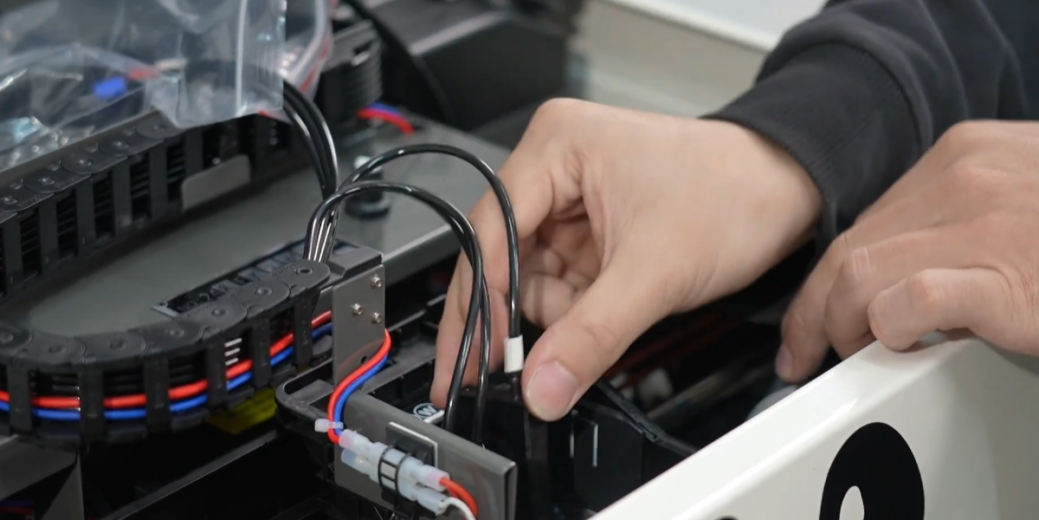
Disconnect the printhead ribbon cables gently to avoid damaging the pins.
Check for ink contamination. Do not disconnect the raster decoder ribbon cable.
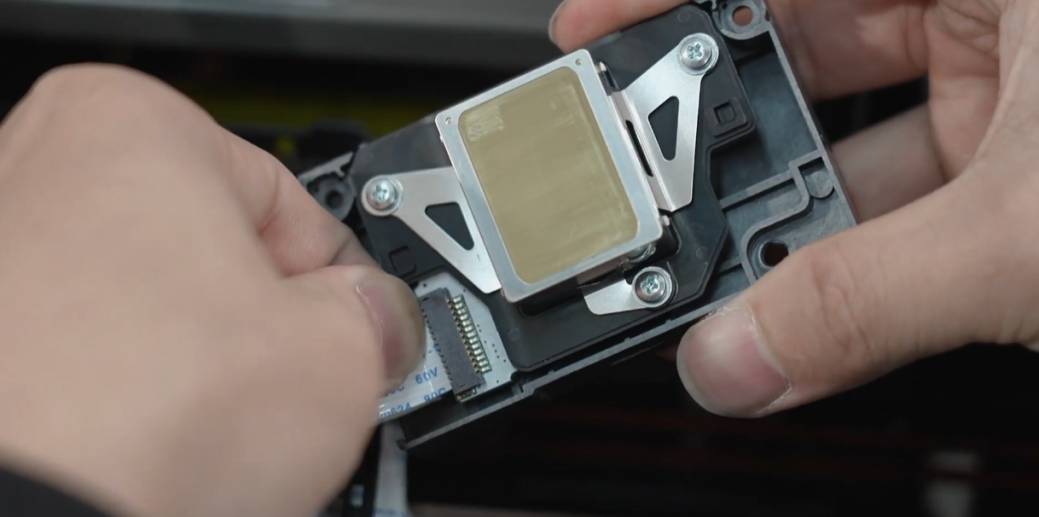
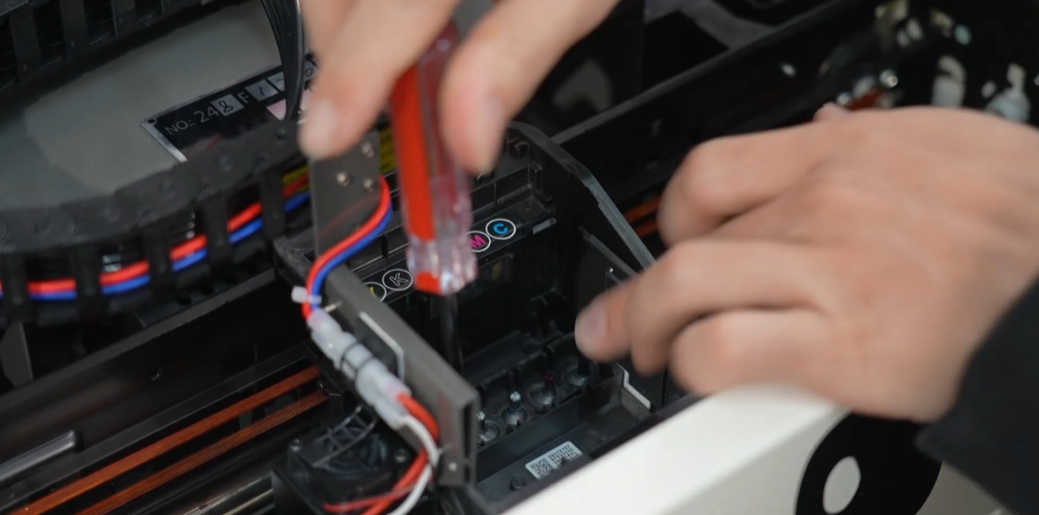
Install the new head and reinsert the ribbon cables, ensuring they are seated squarely.
Secure the new printhead using the original screws and retaining clips.
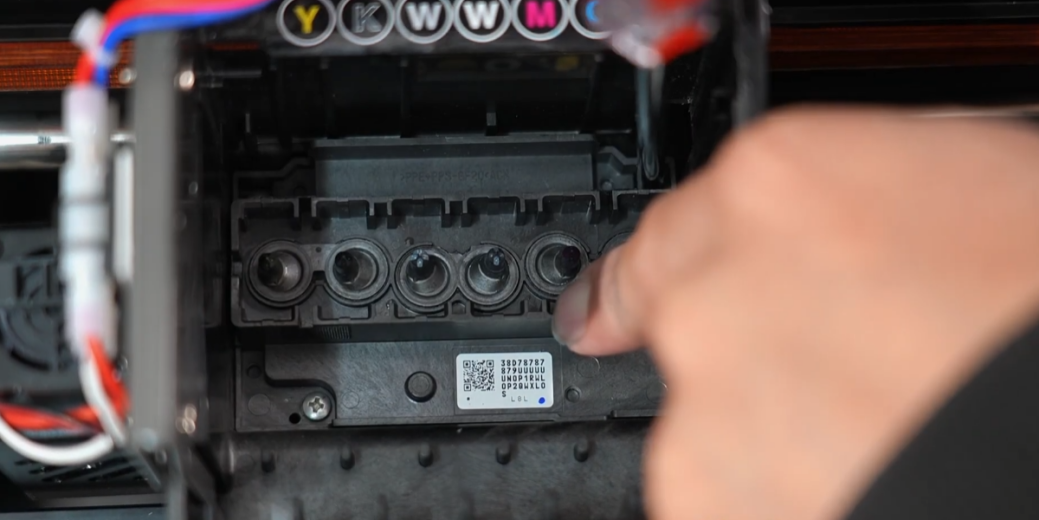
Reinstall the ink dampers (cartridges) onto the printhead intake manifolds.
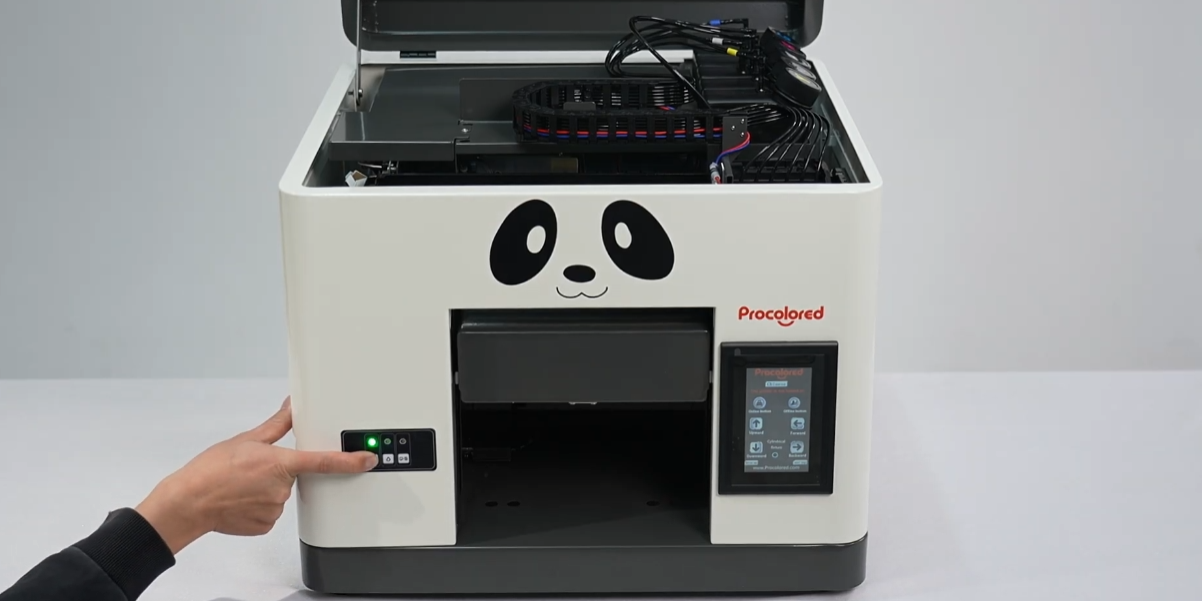
Power on the printer and monitor the automatic self-test initialization process.
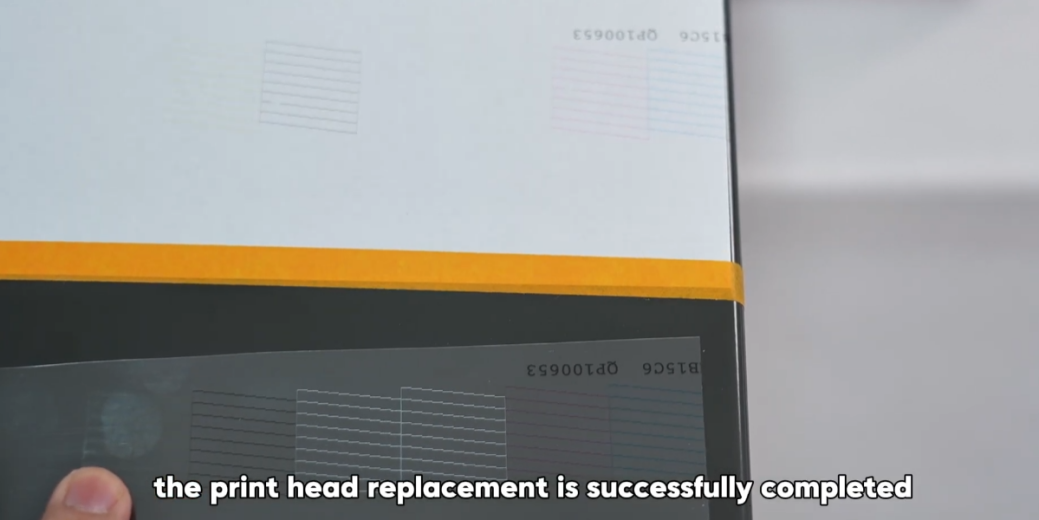
If the self-test passes, the replacement is successful. Run a nozzle check to confirm.