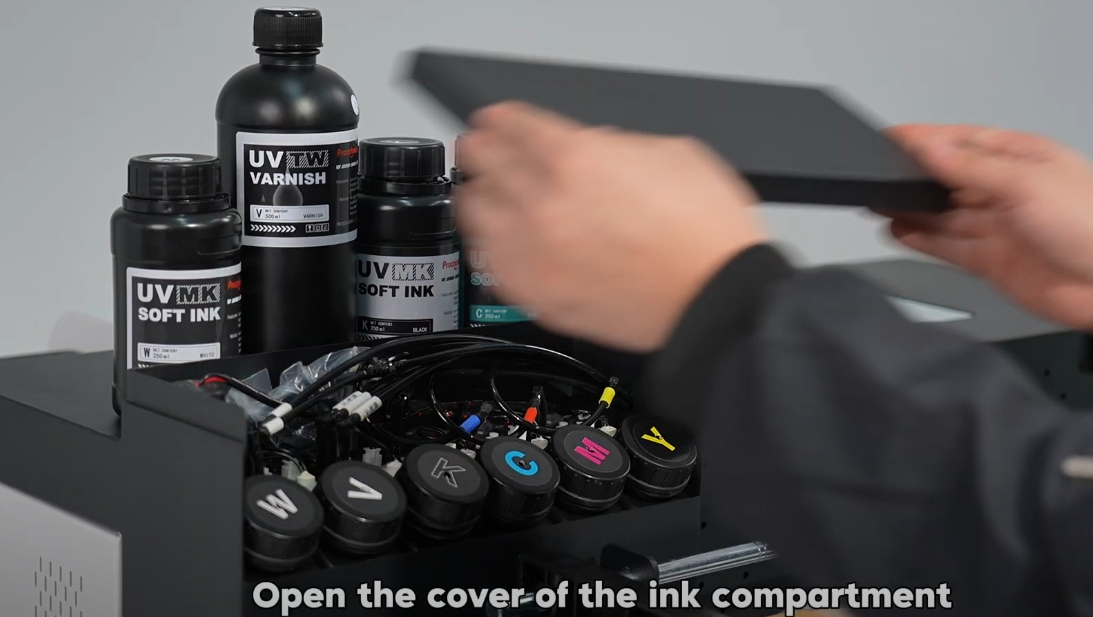
Open the cover of the ink compartment, add the corresponding ink colors.
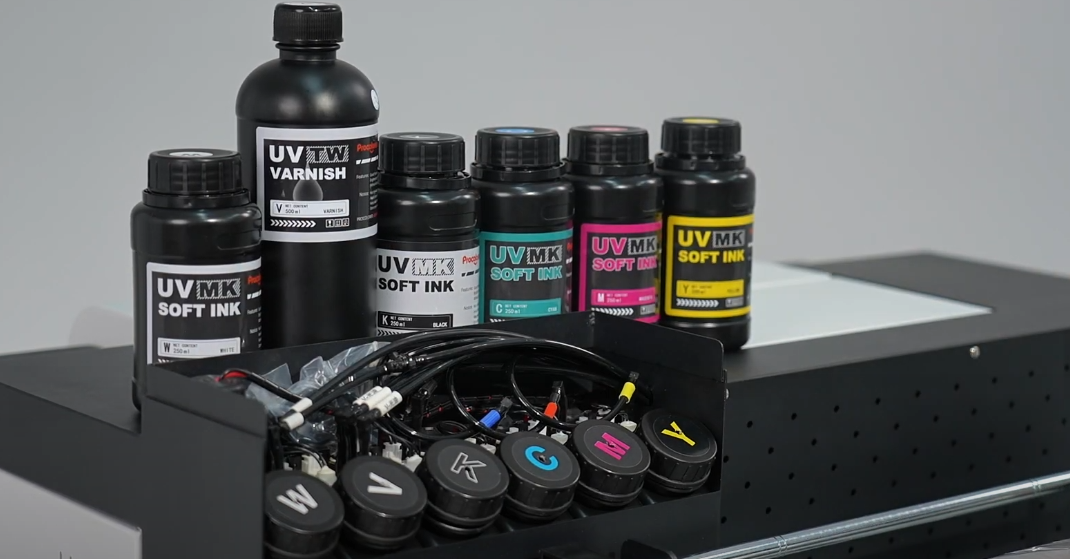
There are 6 ink containers, C refers to cyan ink, M refers to magenta ink, Y refers to yellow ink, K refers to black ink and W refers to white ink and V refers to varnish.
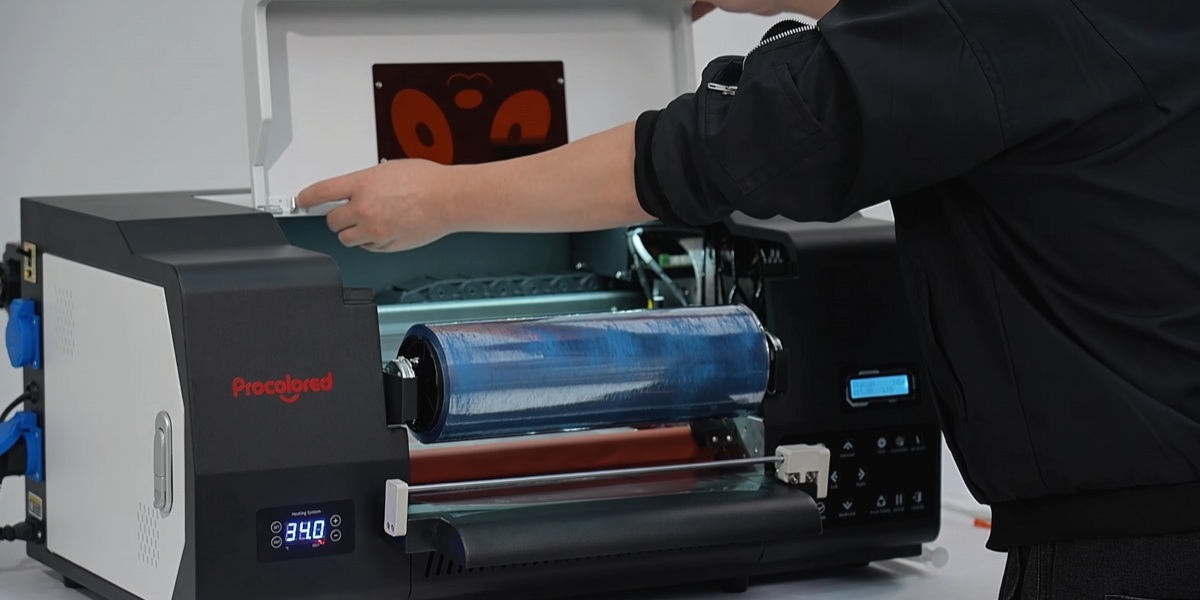
Power on the machine and wait for it to start.
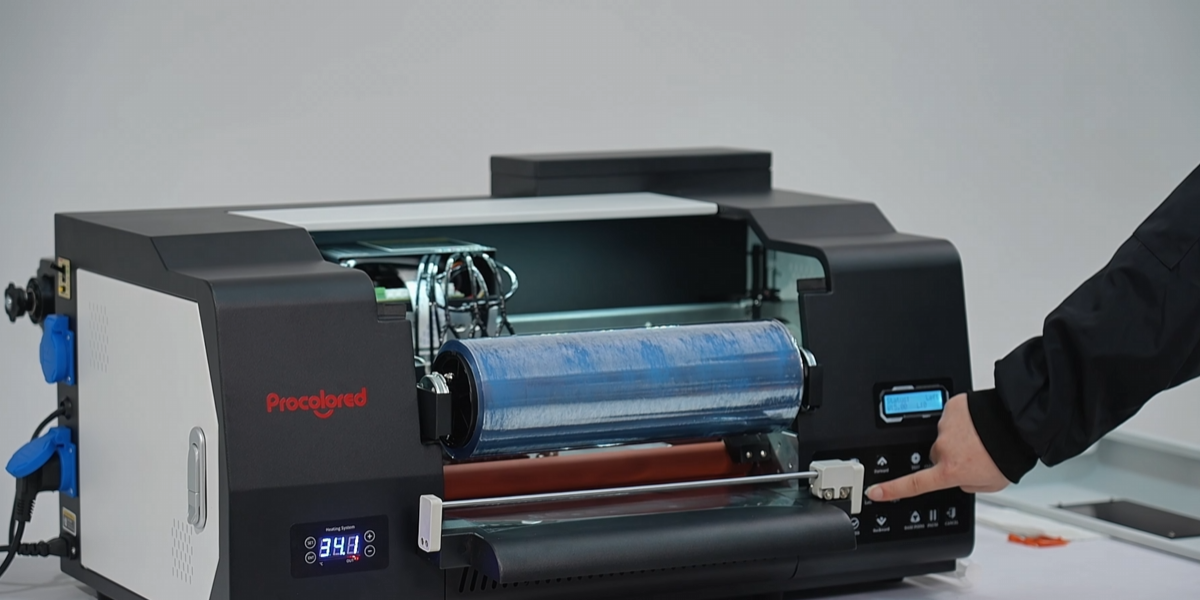
Click the left arrow button on the machine to move the ink cartridge to the center position for easy ink extraction.

Extract 3-5ml of ink from each ink cartridge.
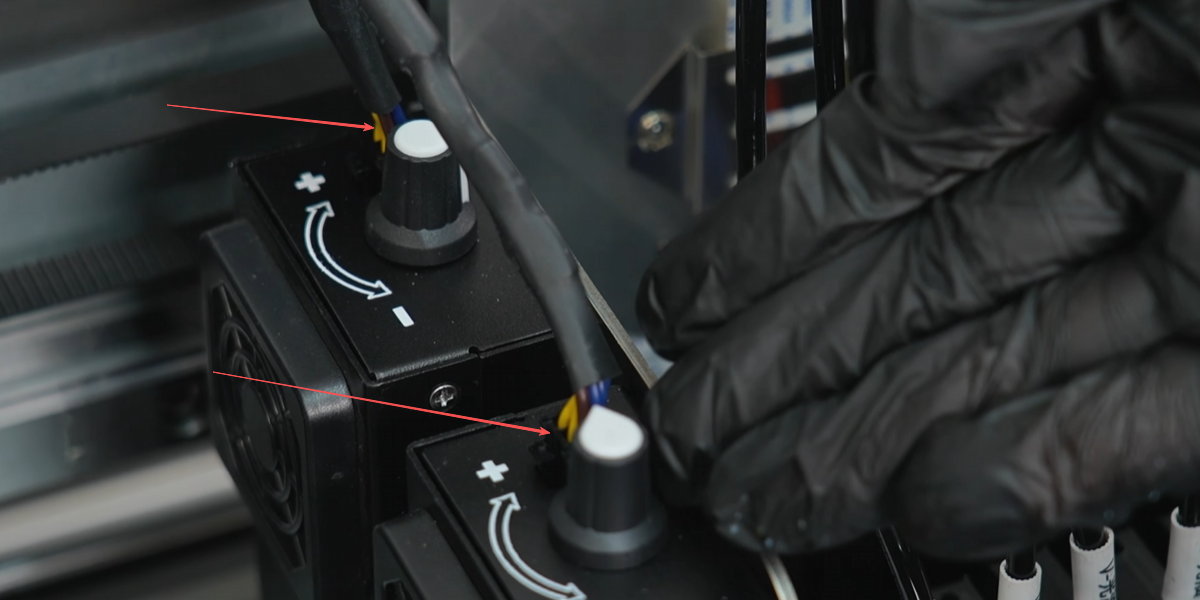
Adjust the UV lamp power using the adjustment knob.
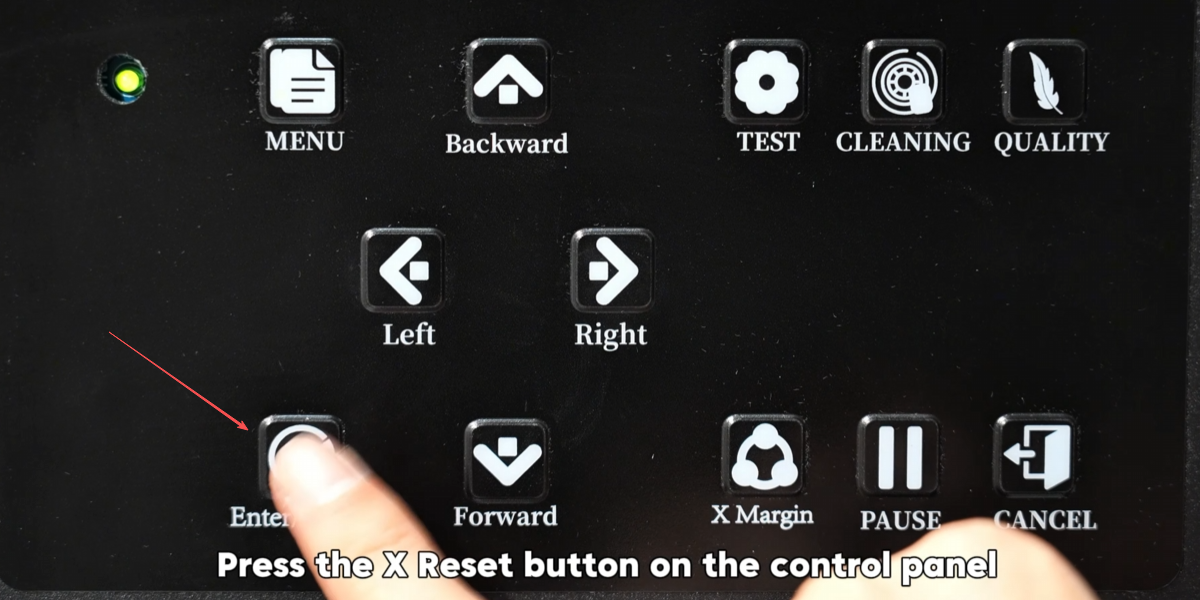
Press the X Reset button on the control panel to move the printhead to the rightmost position.
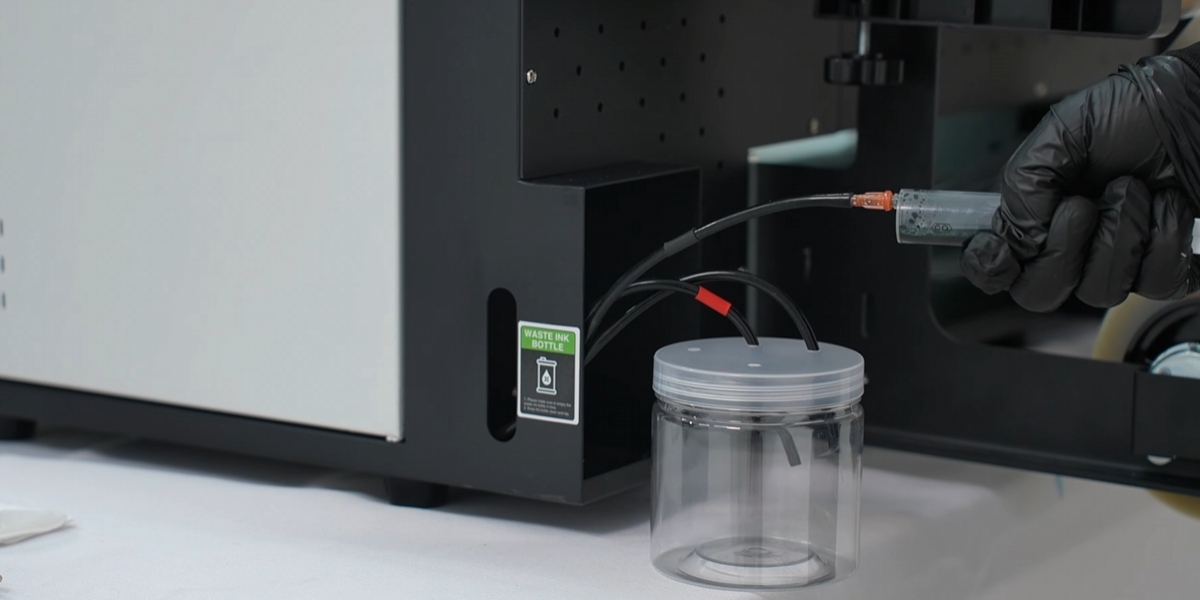
Extract ink from the waste ink tube at the back of the machine to fill the ink path.
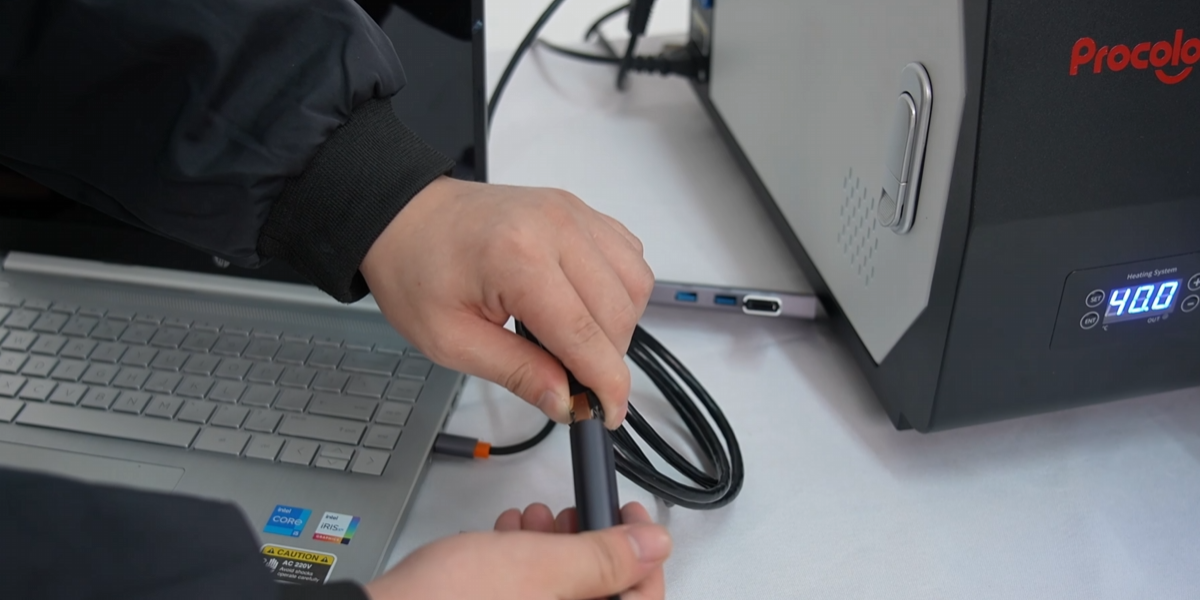
Connect the printer's data cable to the computer via Ethernet adapter.
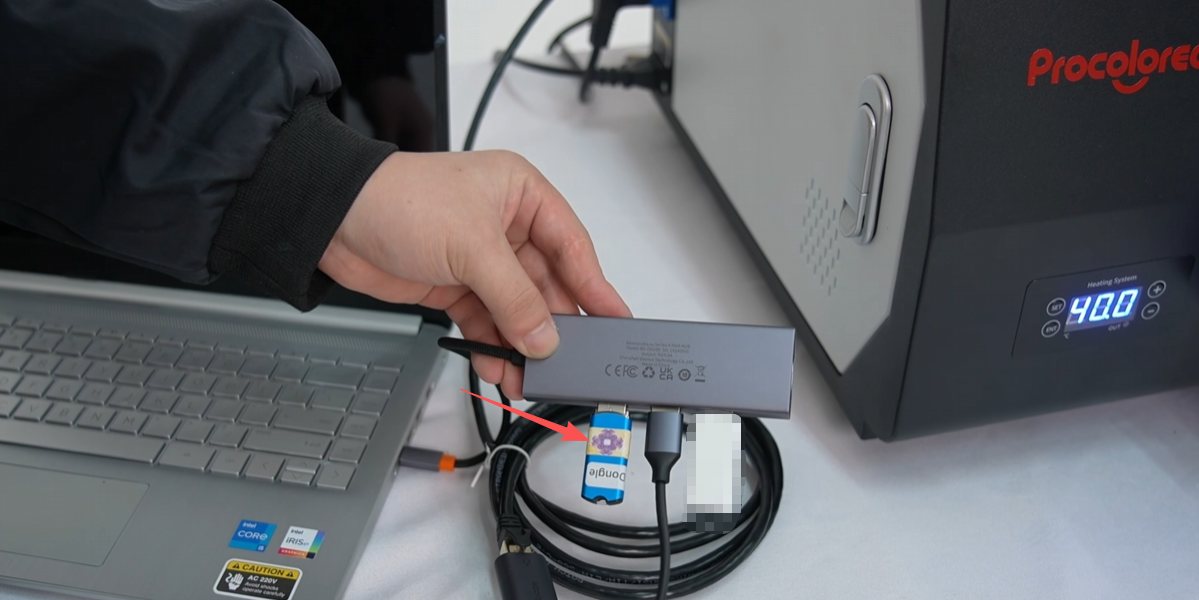
Plug in the blue USB dongle drive.
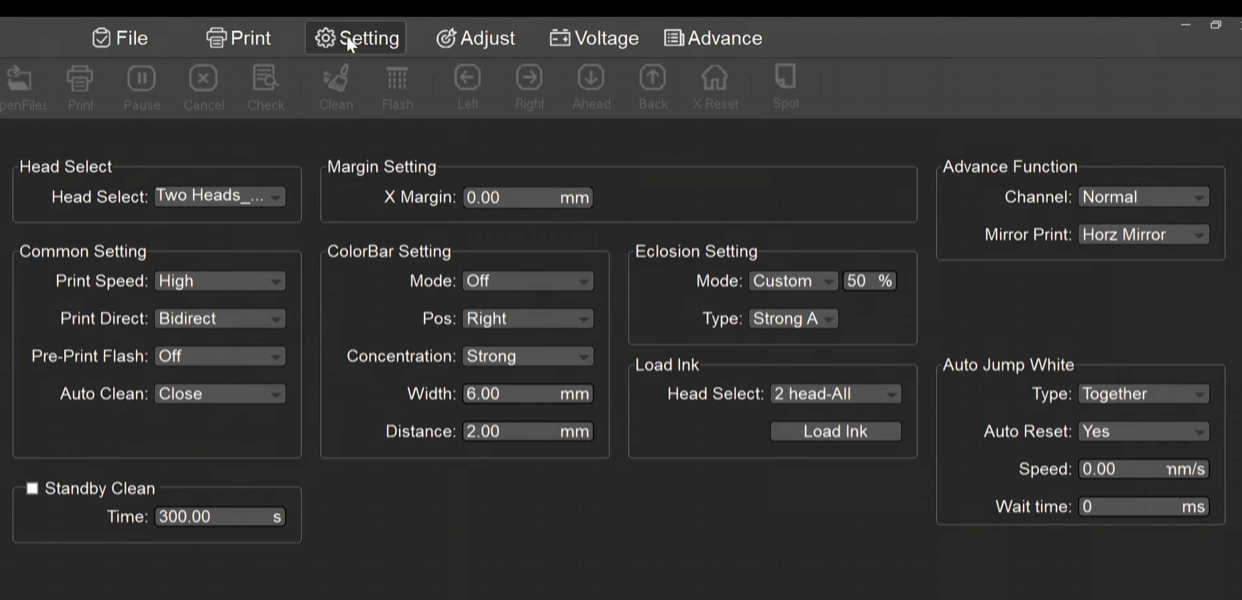
Open the machine's control software, PrintEXP, and click the setting.
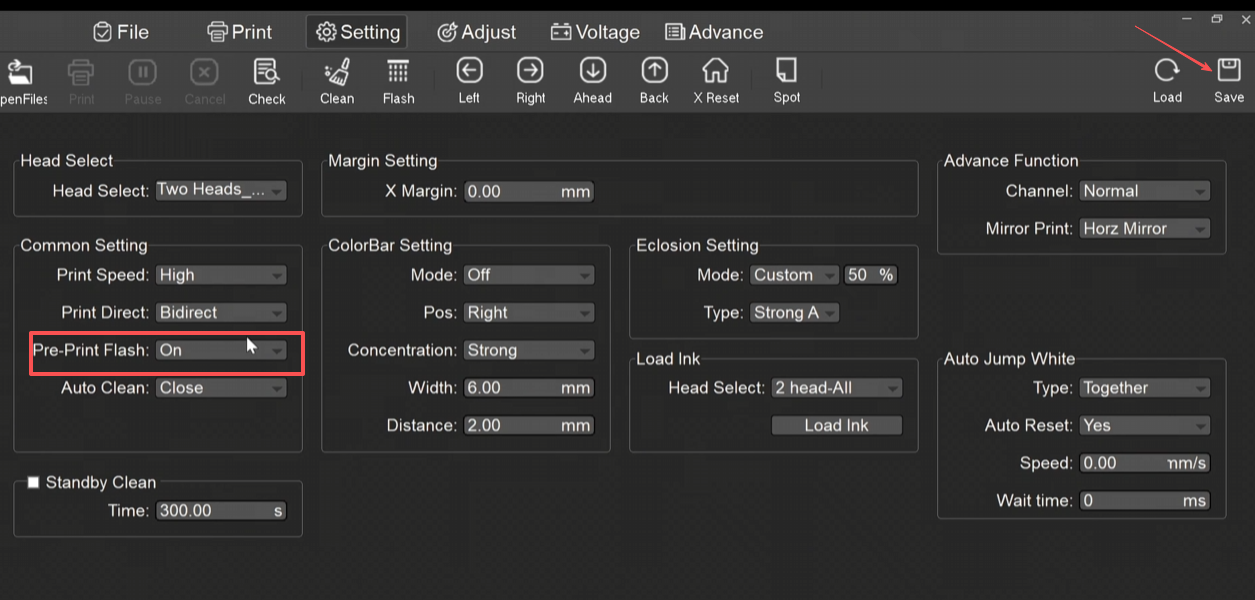
First enable the flash function.Pre-Print Flash: On and click save.
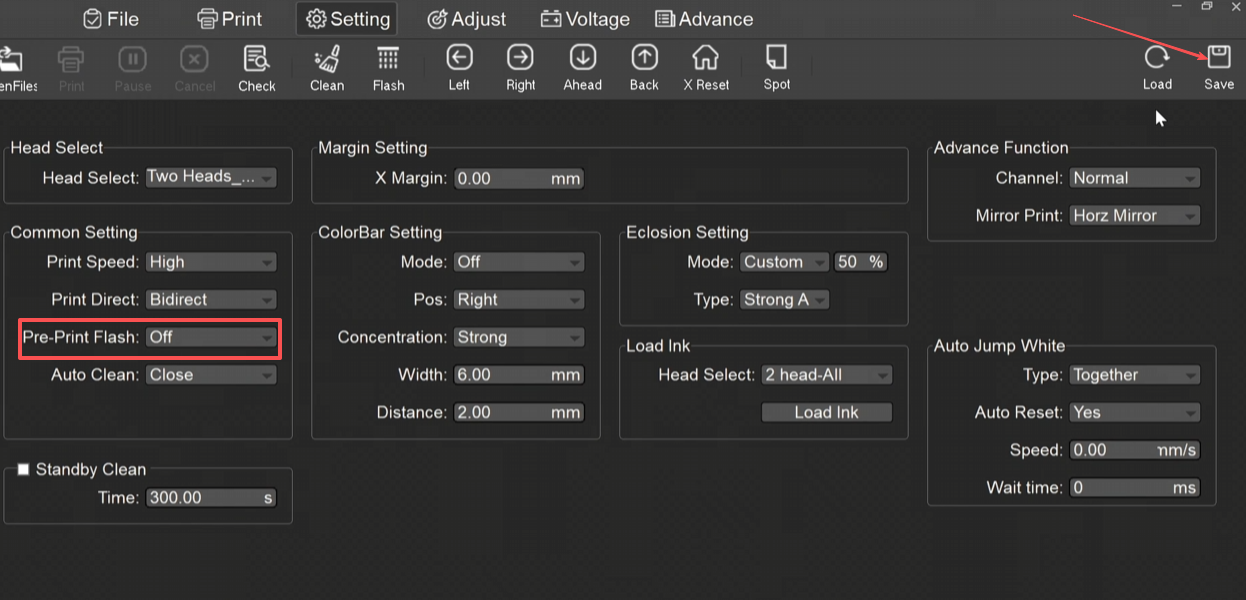
When shutting down the printer, remember to turn off the flash function before disconnecting the power.
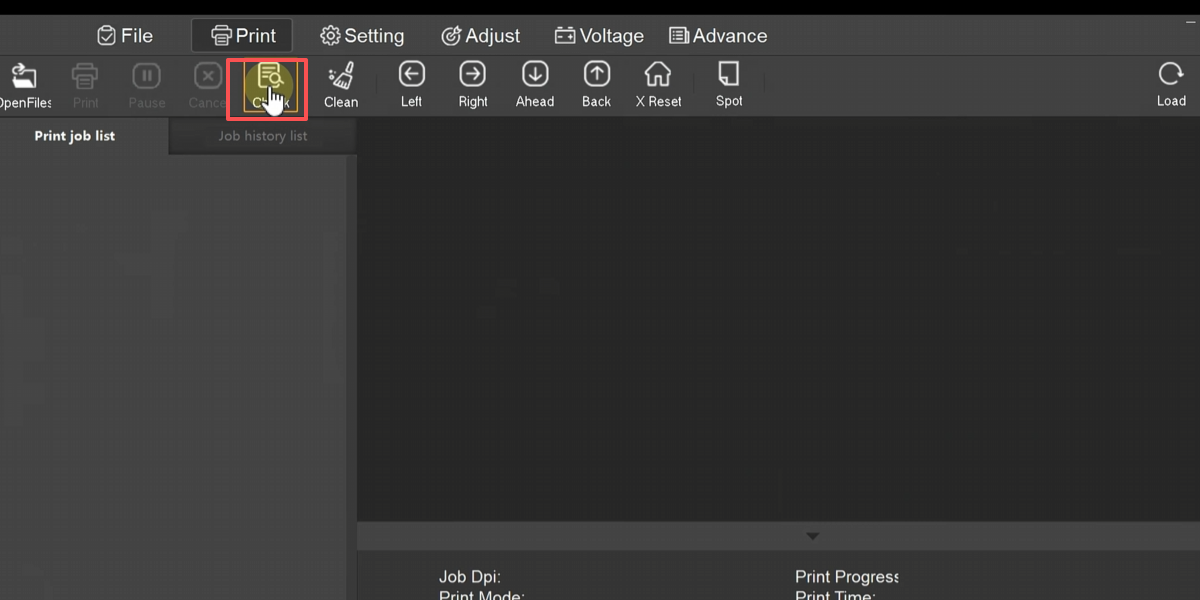
Click the Check button in PrintEXP to print the printhead status test image.
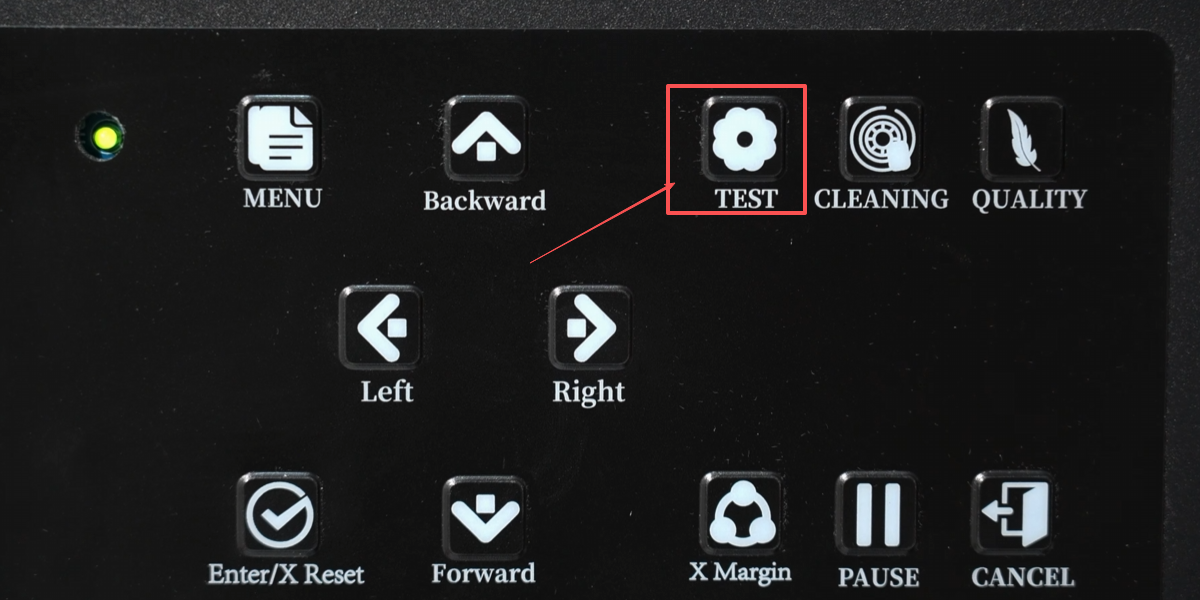
Or click the Test button on the printer to print the printhead status test image
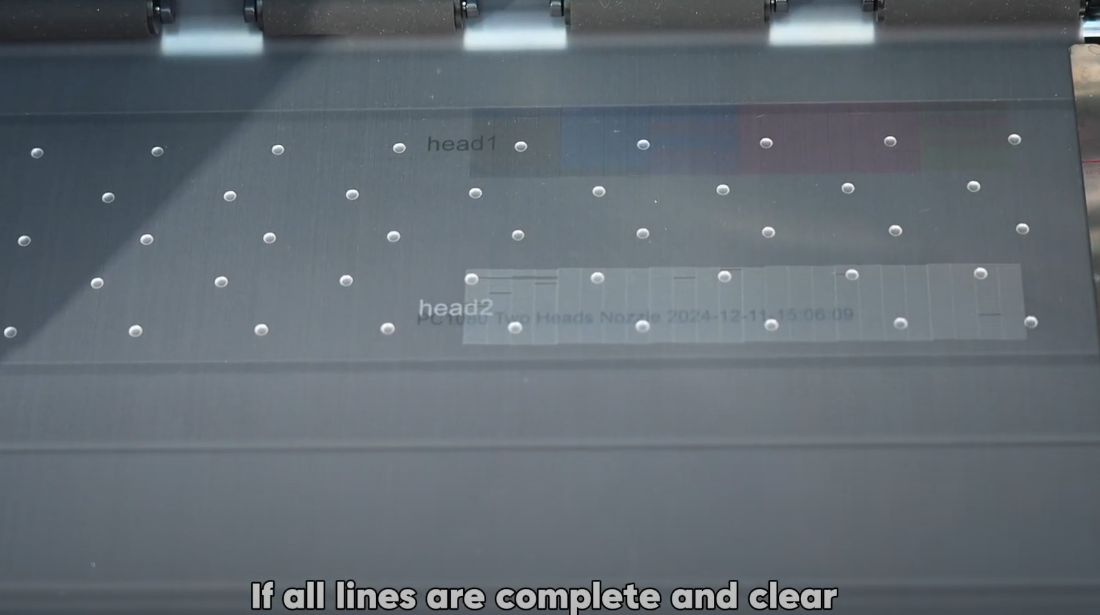
When you see all the color lines clearly and continuously without any breaks. It indicates that the printhead is in good condition.