Move the ink cart to the middle position.
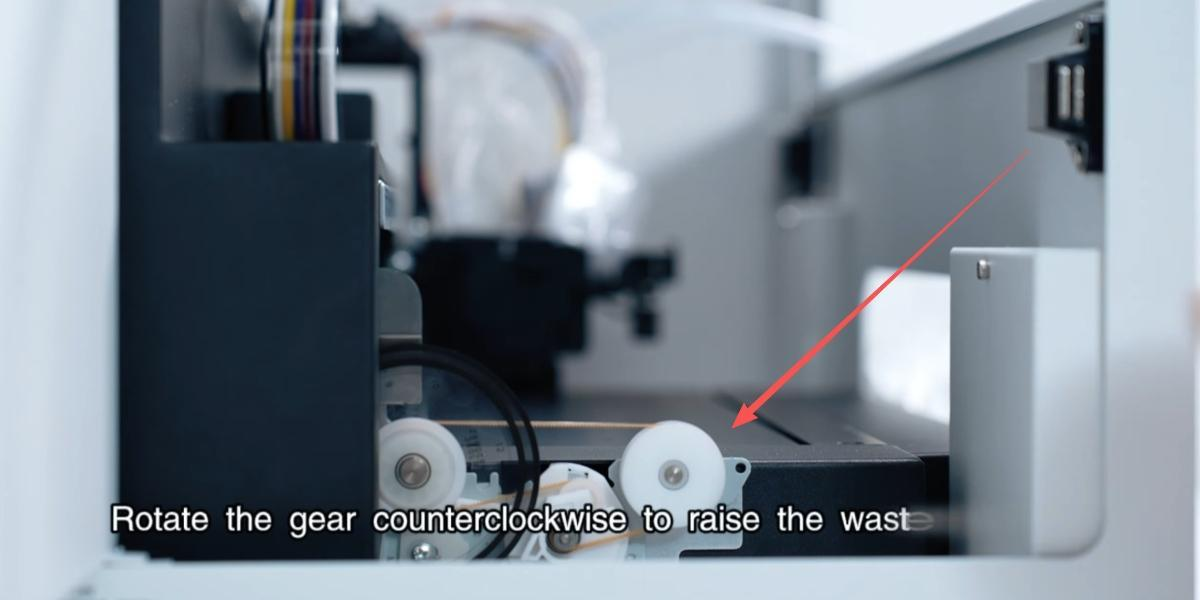
Rotate the gear clockwise to lower the height of the waste ink pump.
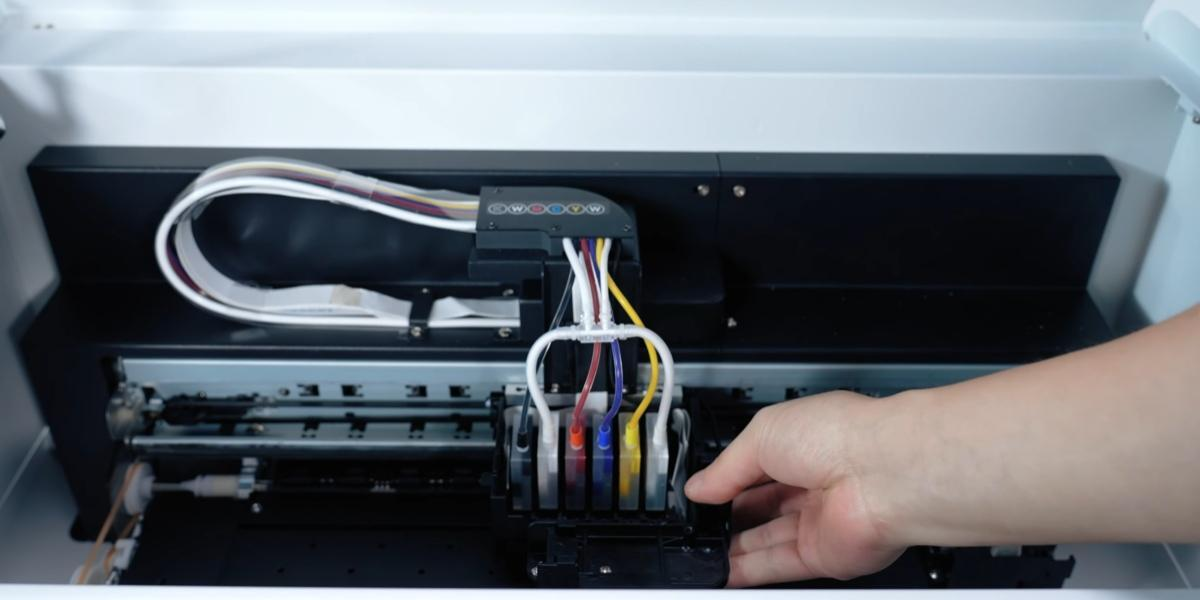
Remove the moisturizing device ink bag.
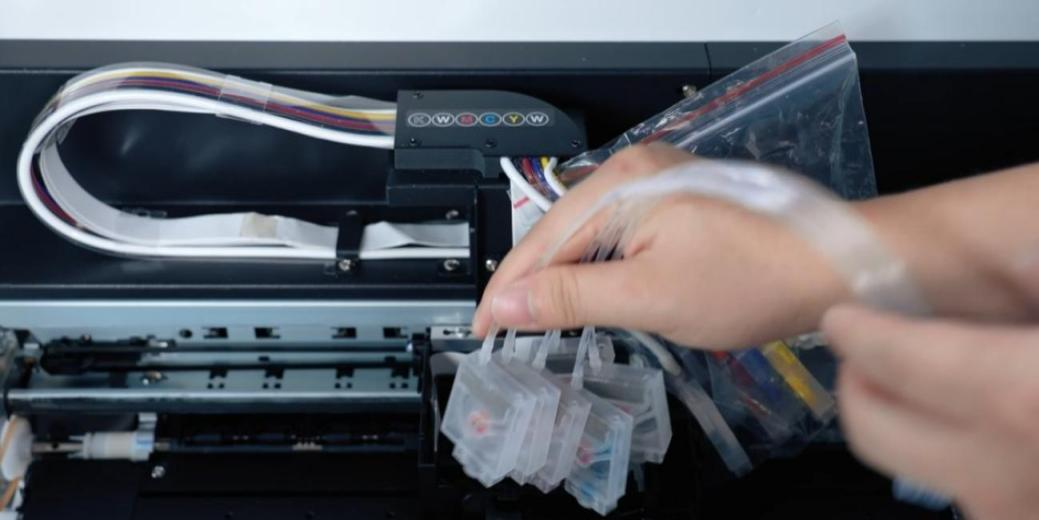
Remove the ink bag from the sealed bag.
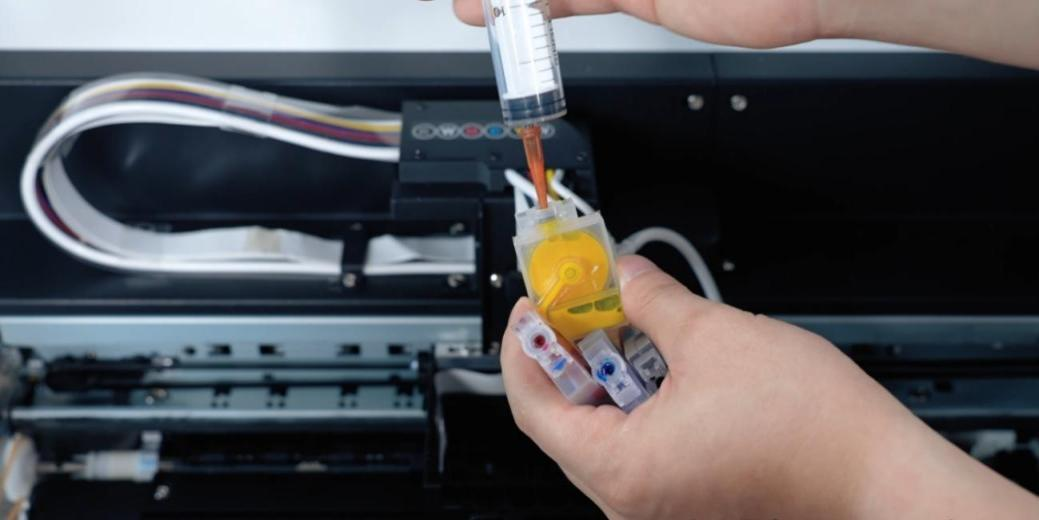
Use a syringe to extract 3ml of ink from each ink bag separately.
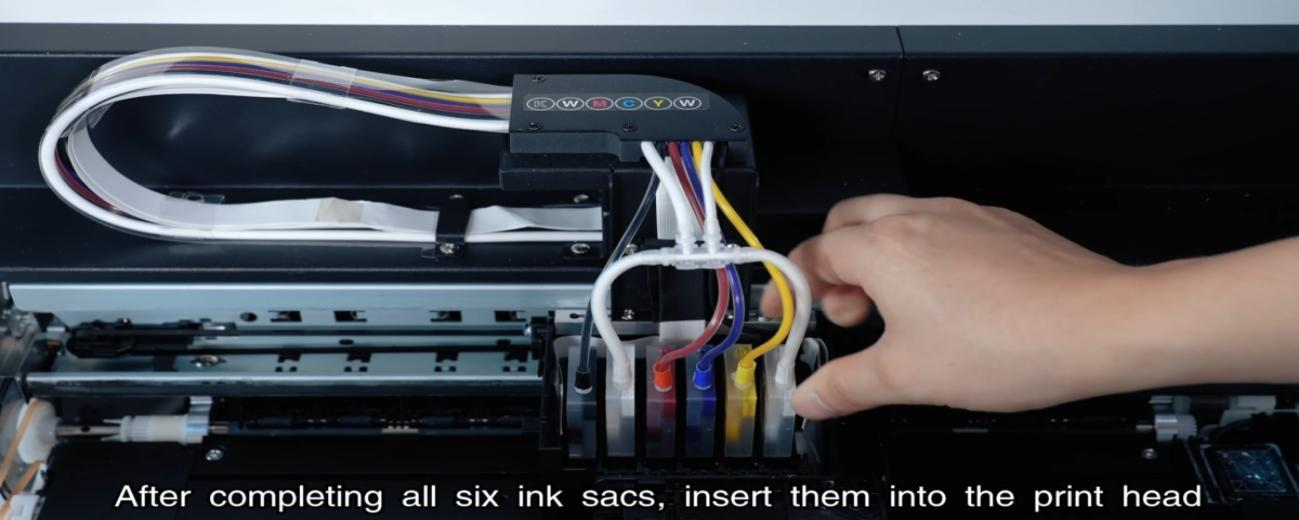
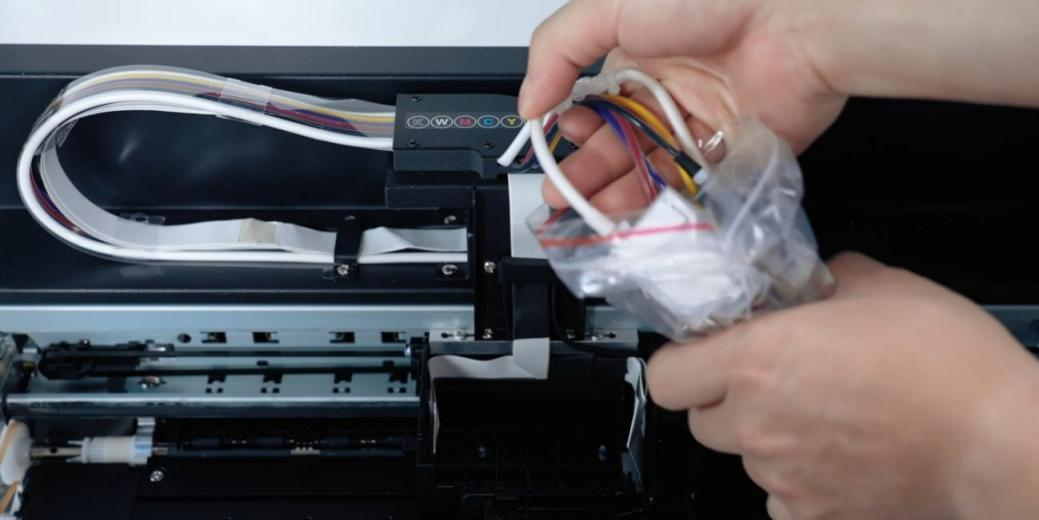
After completing all six ink sacs, insert them into the print head.
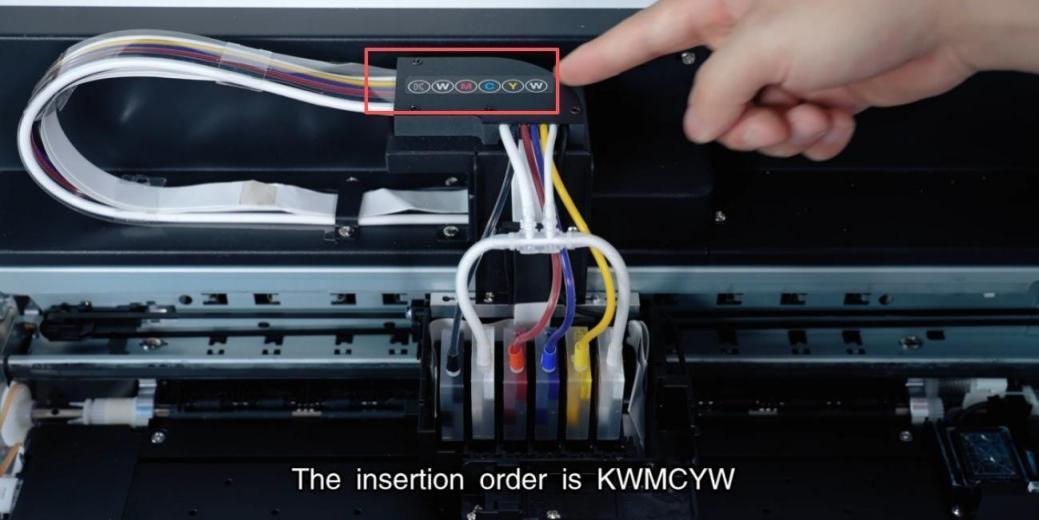
The insertion order is KWMCYW.
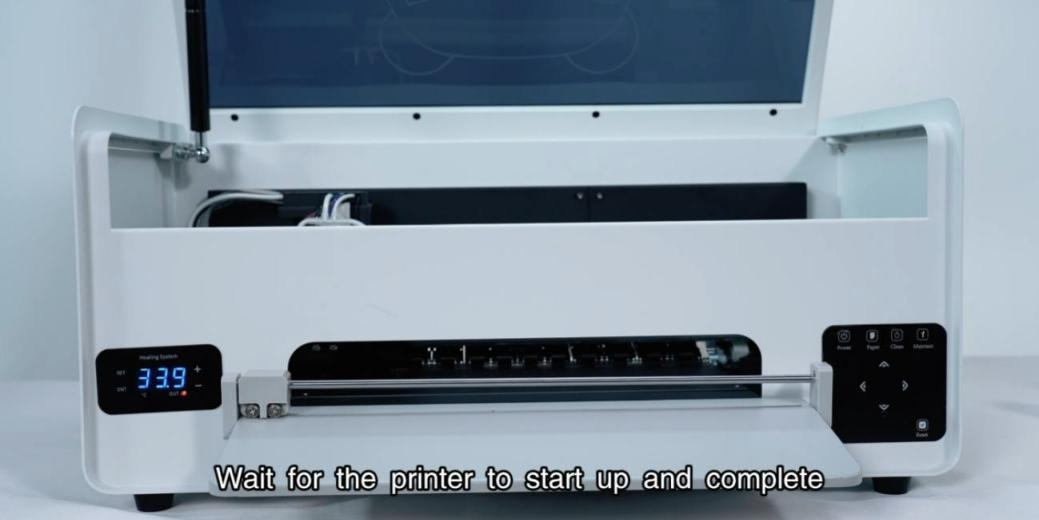
Power on the printer. Wait for the printer to start up and complete.
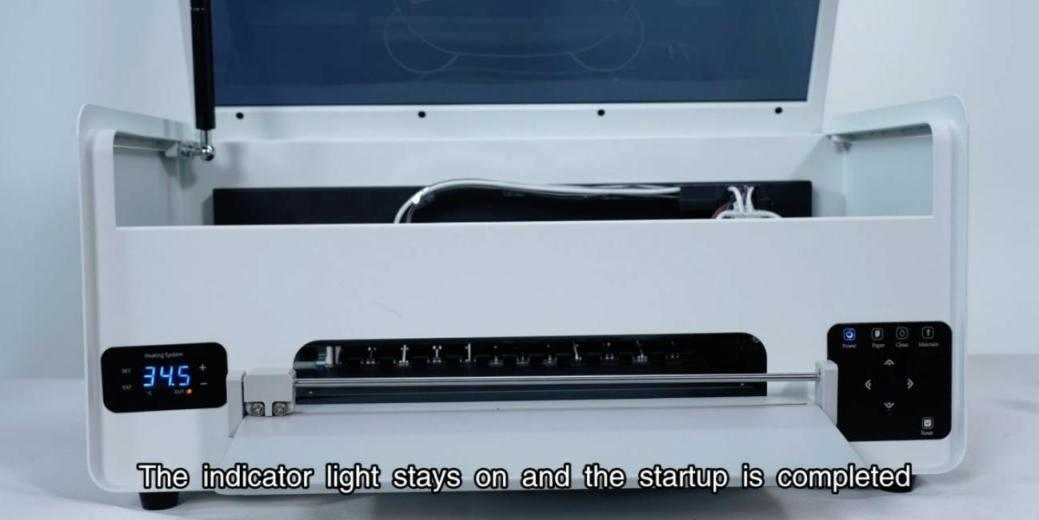
The indicator light stays on and the startup is completed.
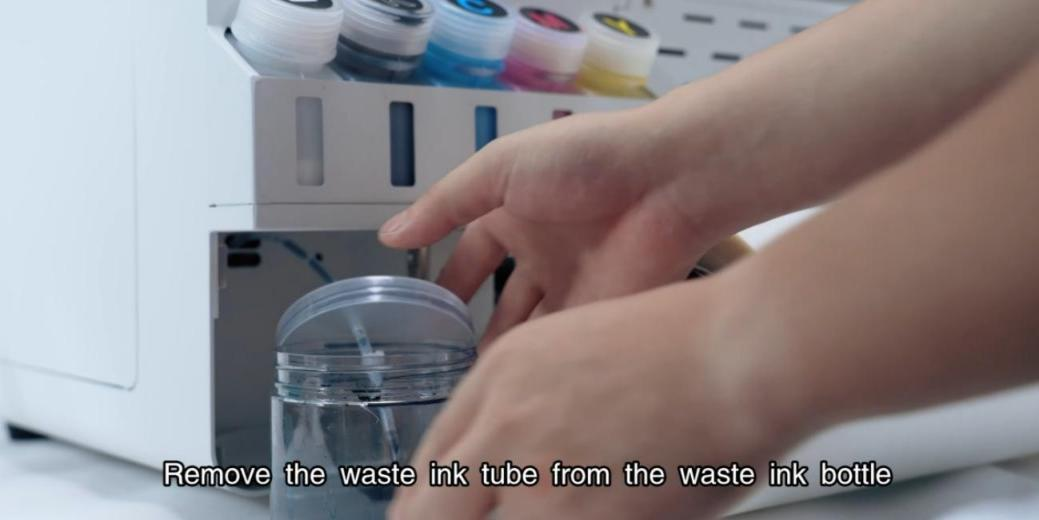
Remove the waste ink tube from the waste ink bottle.
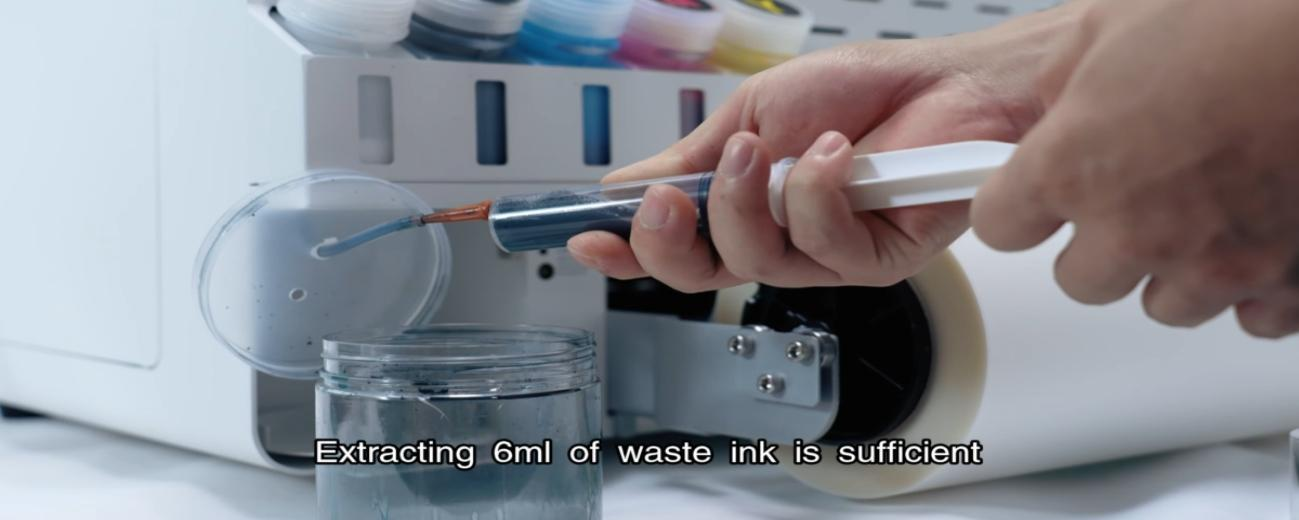
Use a syringe to extract 6ml of waste ink from the tubes.
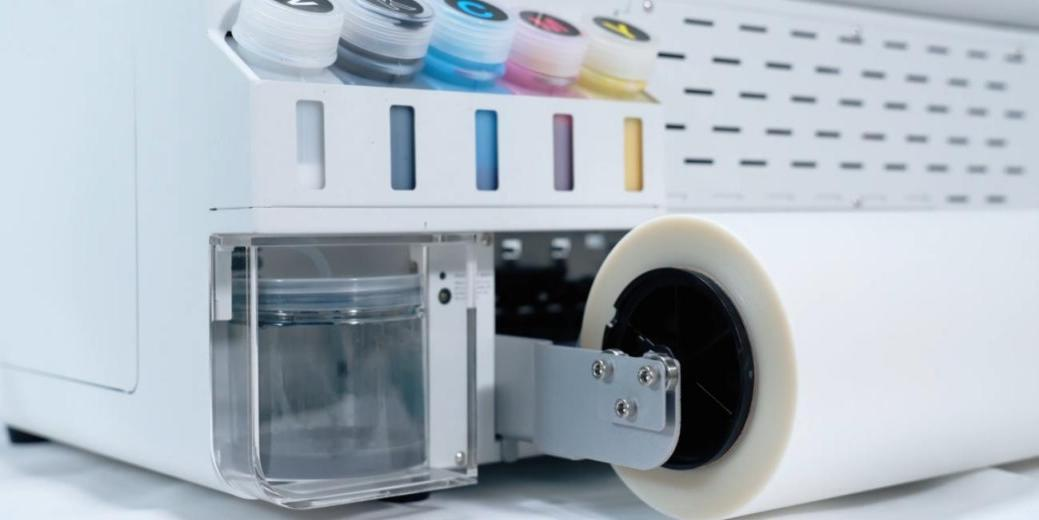
Then put the waste ink bottle back.
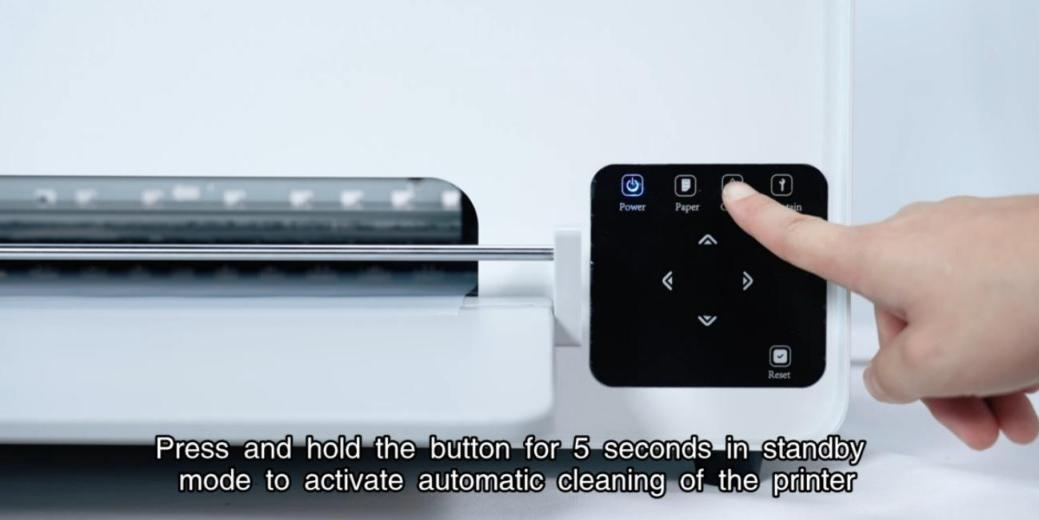
Hold the button for 5s in standby mode to active automatic cleaning.
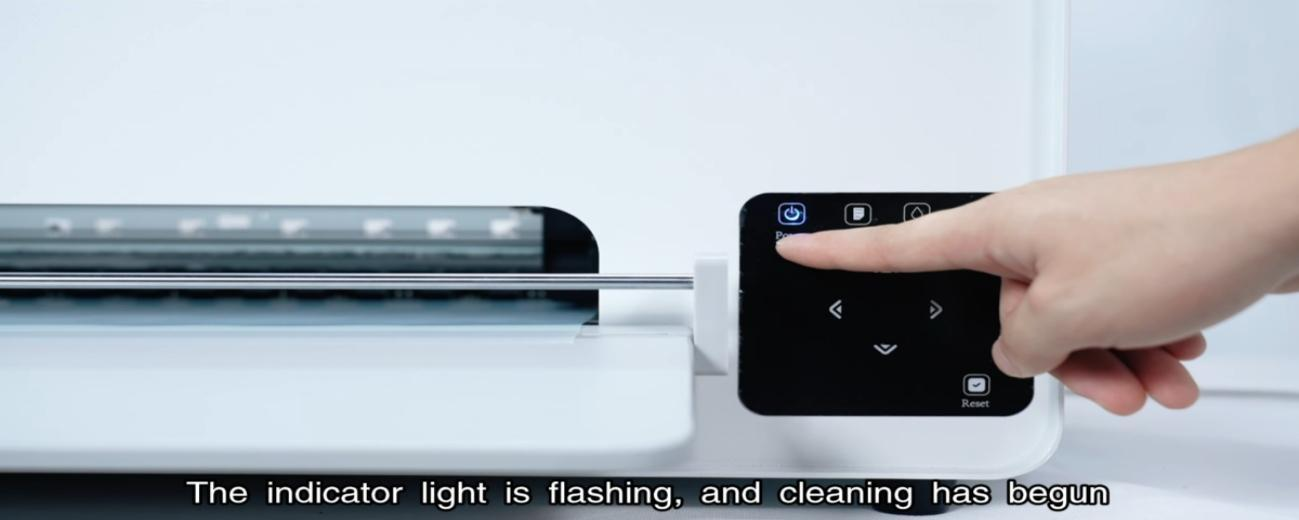
The indicator light is flashing, and cleaning has begun.
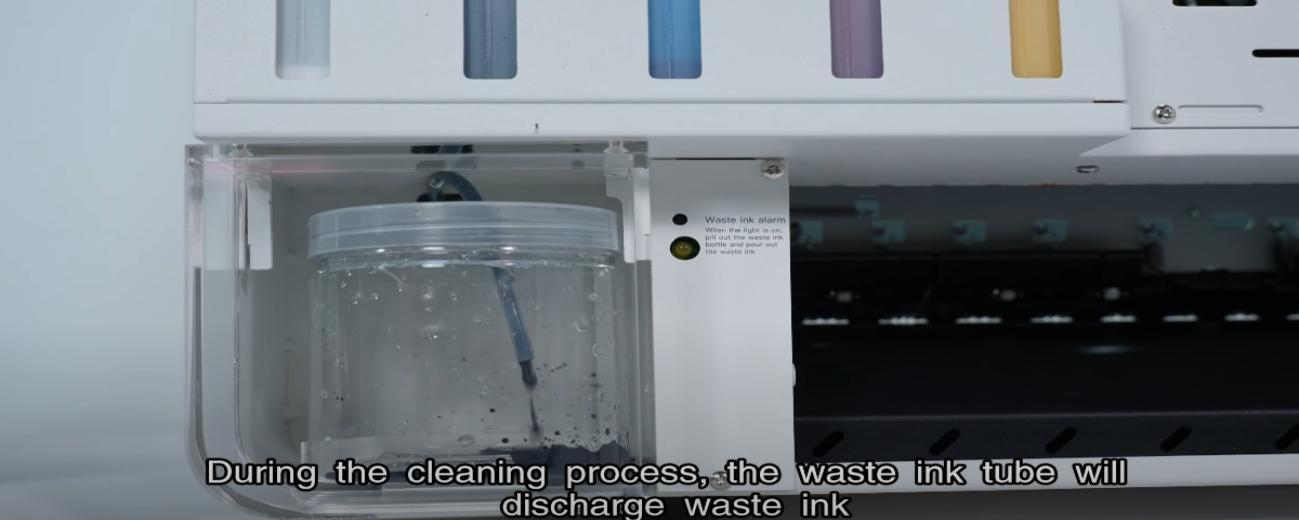
During automatic cleaning, the waste ink tube will discharge waste ink.

Click on the print test page in the printer utility toolbar.
The print head starts moving to print the test page.
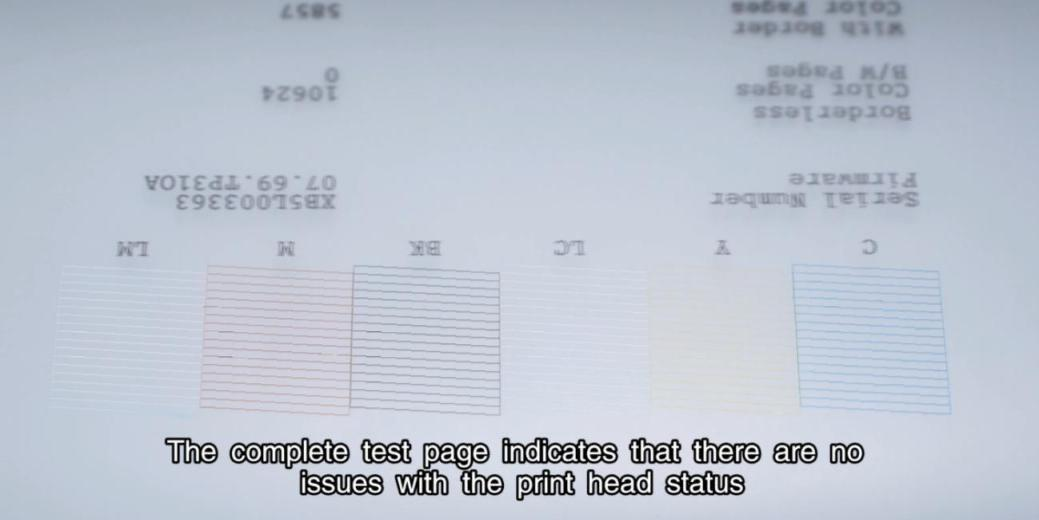
The complete test page indicates no issues with the print head status.