 01If all cleaning and ink extraction procedures fail to resolve the print head clogging, replace the print head. |
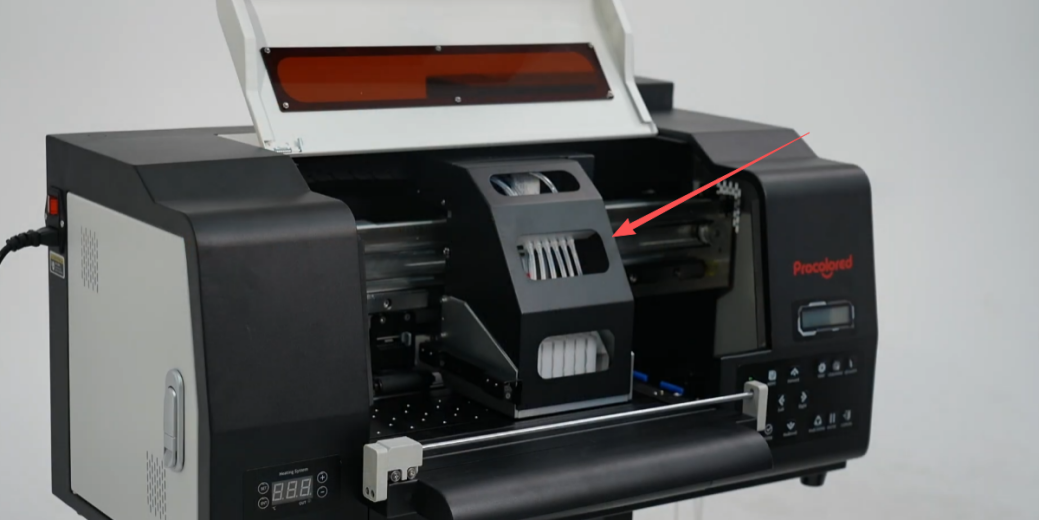 02Remove the cover securing the print head. |
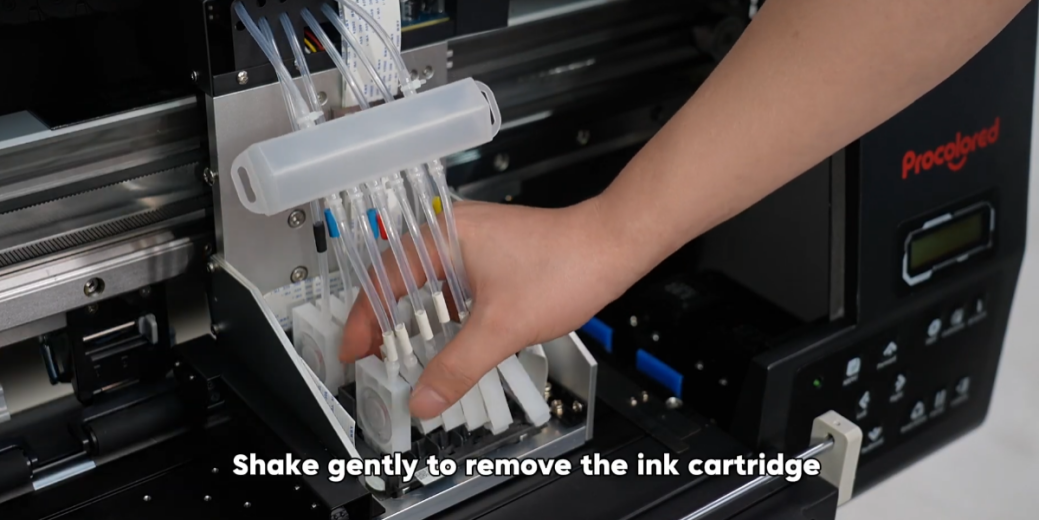 03Shake gently to remove the ink cartridge. |
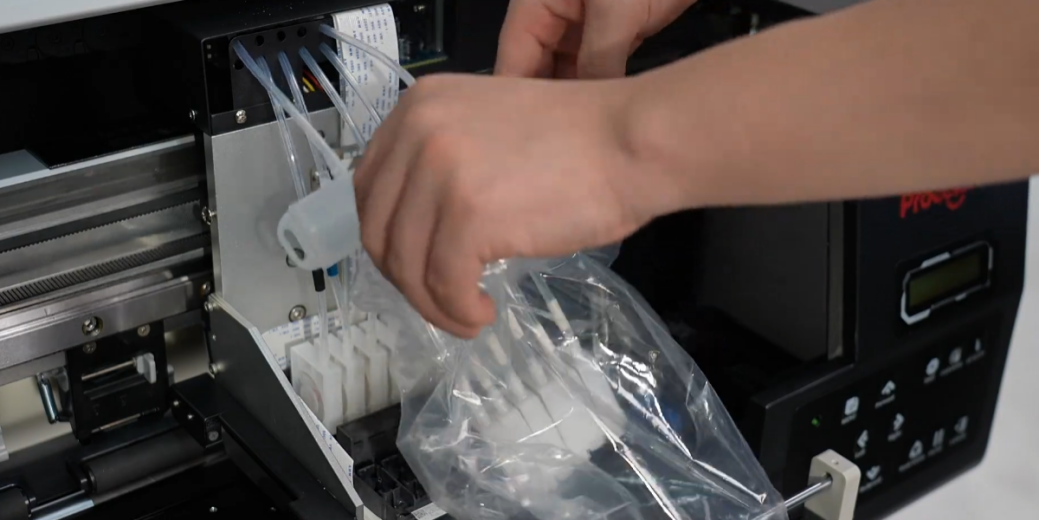 04Seal the cartridges in a plastic bag to prevent ink leakage. |
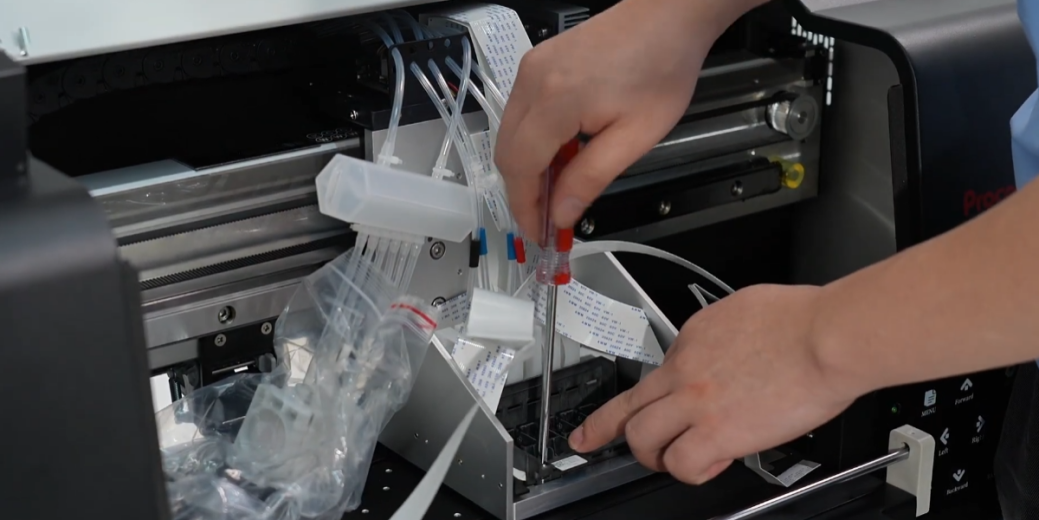
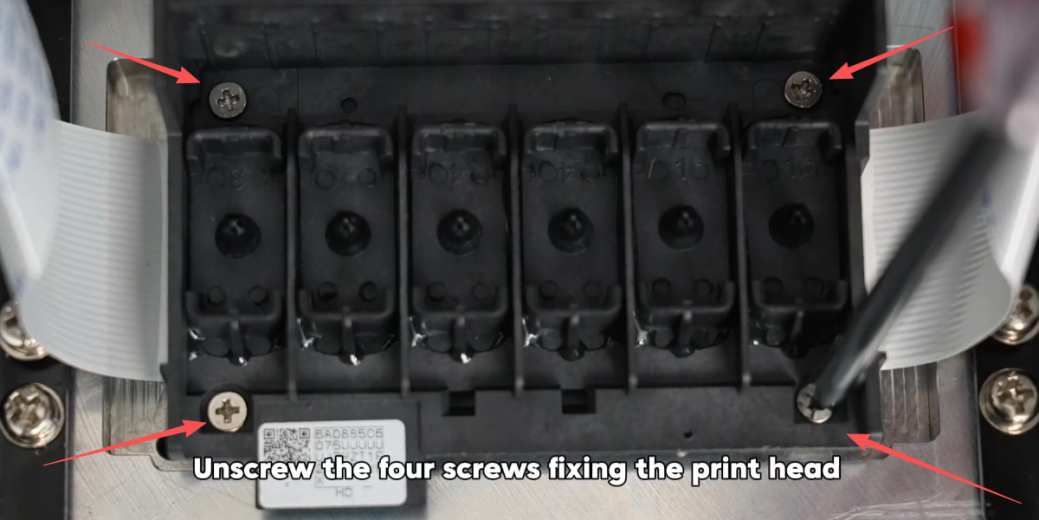 05Unscrew the four screws fixing the print head. |
 06Unscrew the screws and take out the clip. |
 07Unscrew the screws and take out the cover. |
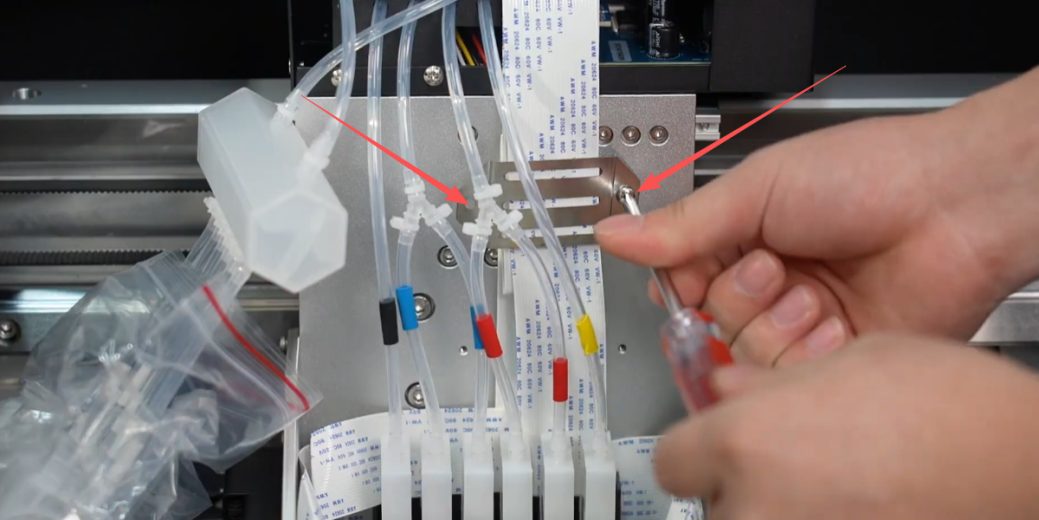
 08Disconnect the print head ribbon cable. Check for ink contamination. Do NOT disconnect the encoder strip's ribbon cable. |
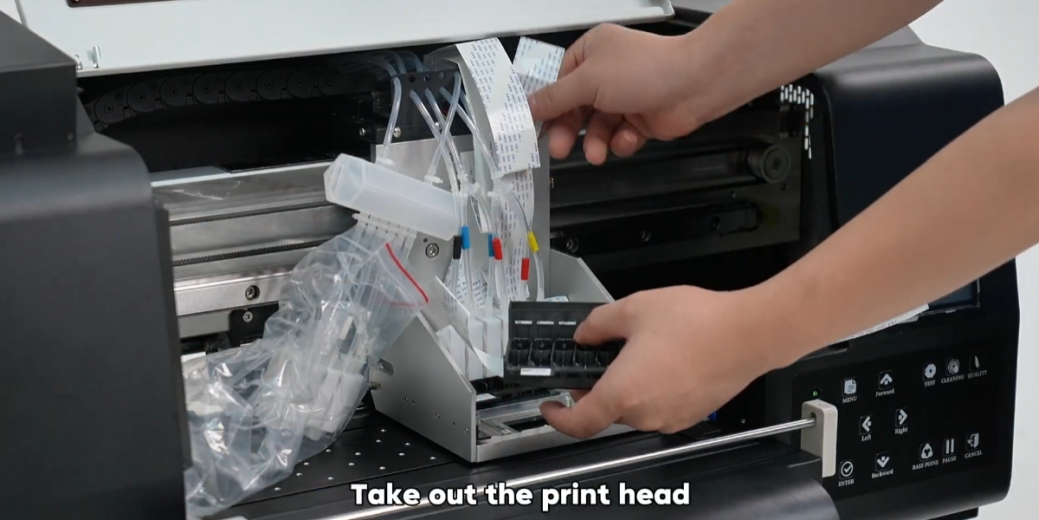 09Take out the print head. |
 10Install the new print head and secure it with the screws. |
|
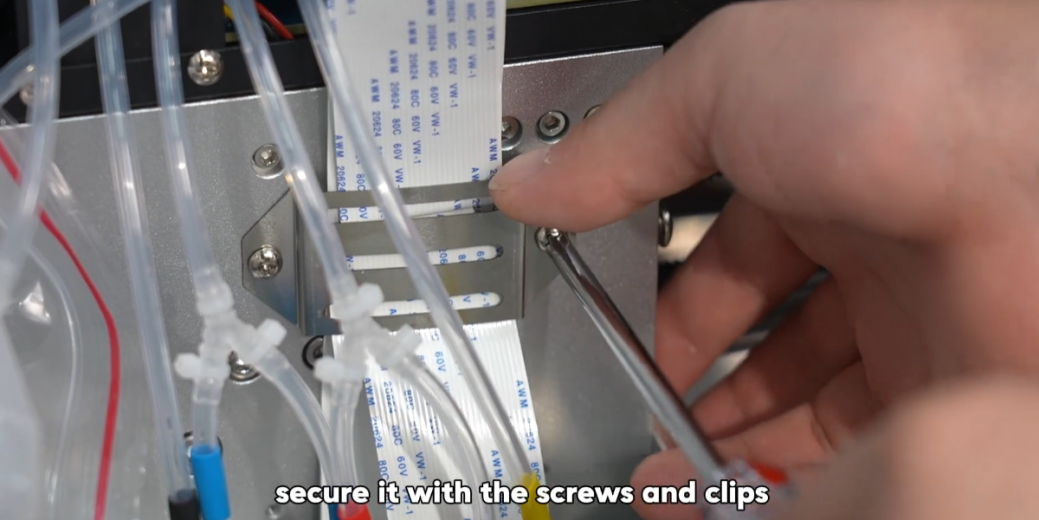
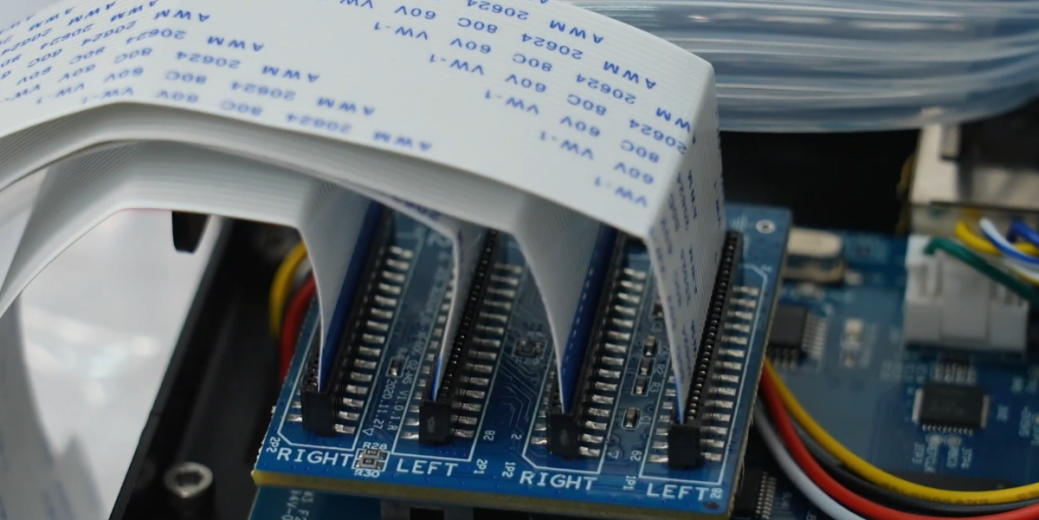 12Insert back the ribbon cables. |
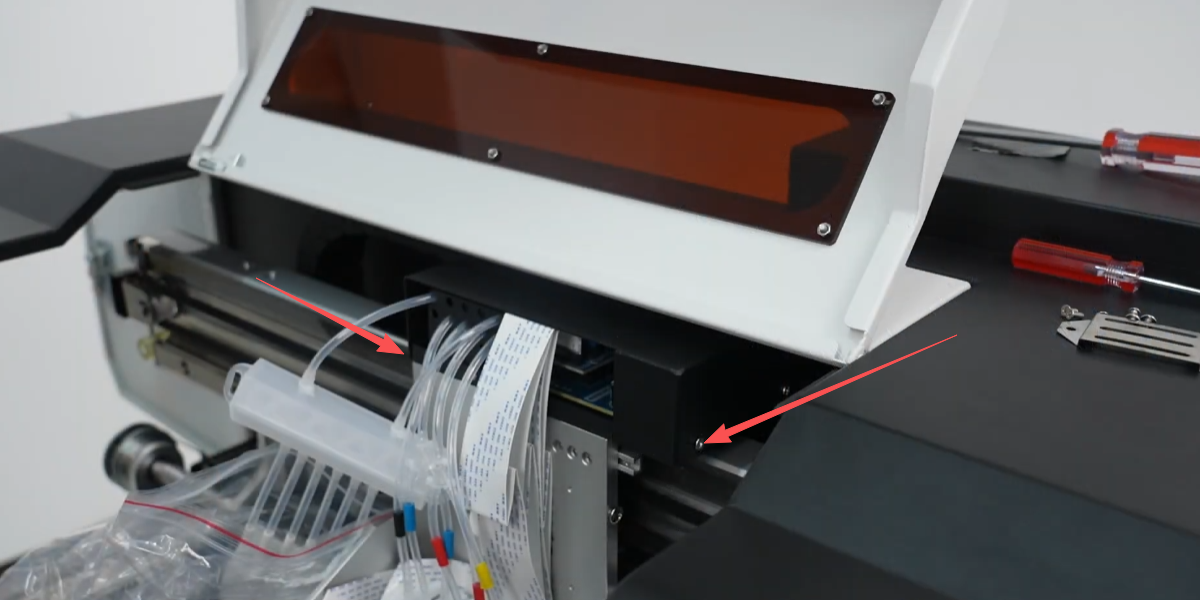 13Install back the black cover. |
 14Install the ink cartridge. |
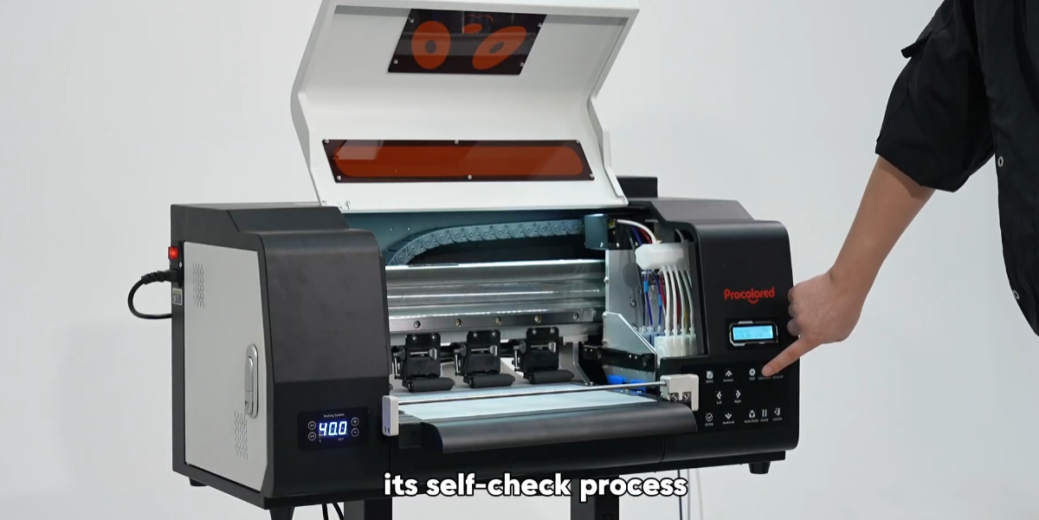 15Power on the machine and observe its self-check process. |
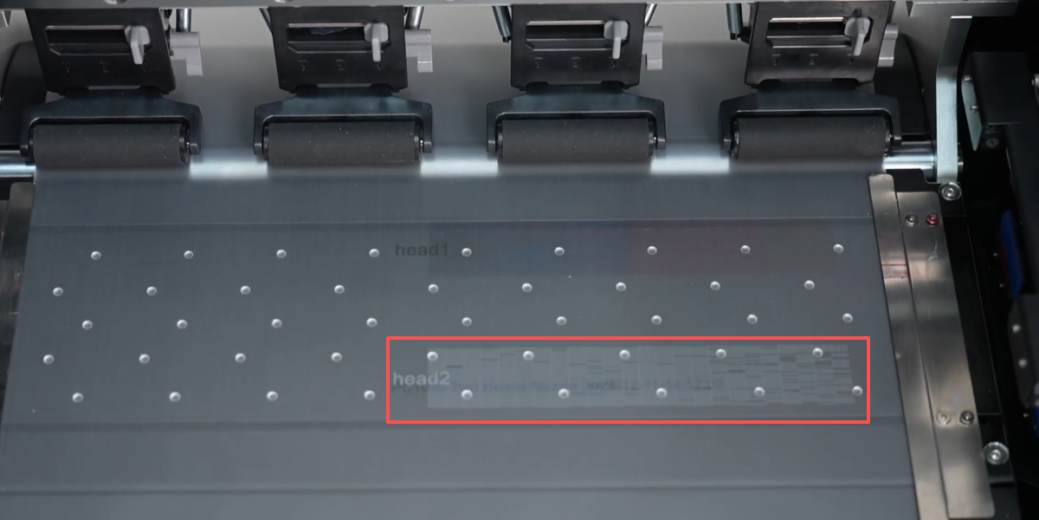
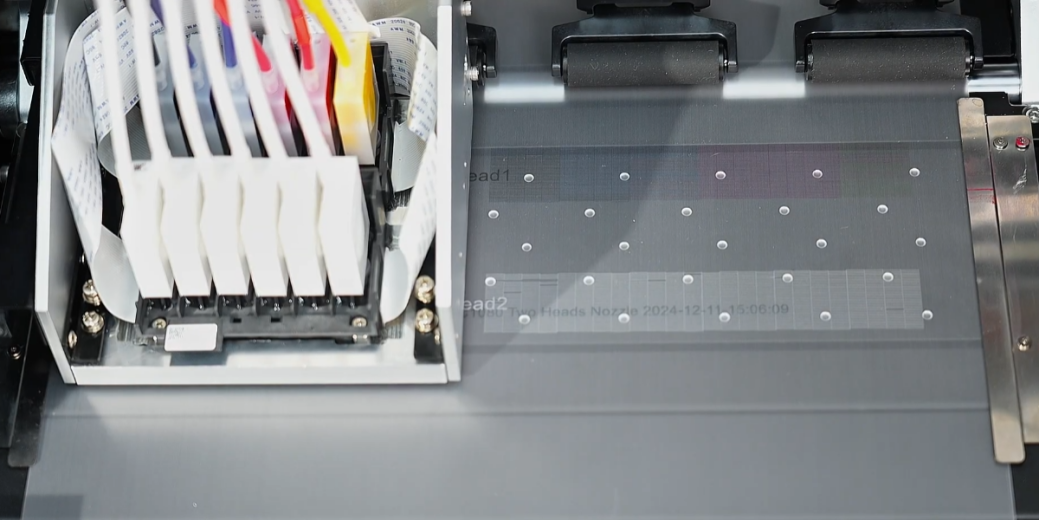
 16If the self-check passes, the nozzle check page is good. |
 17The print head replacement is successfully completed. |
|